This is the multi-page printable view of this section.
Click here to print.
Return to the regular view of this page.
Contributing to this project
This section contains documents for CVAT developers.
Please take a moment to review this document in order to make the contribution
process easy and effective for everyone involved.
Following these guidelines helps to communicate that you respect the time of
the developers managing and developing this open source project. In return,
they should reciprocate that respect in addressing your issue or assessing
patches and features.
1 - Development environment
Installing a development environment for different operating systems.
Setup the dependencies:
-
Install necessary dependencies:
Ubuntu 22.04/20.04
sudo apt-get update && sudo apt-get --no-install-recommends install -y build-essential curl git redis-server python3-dev python3-pip python3-venv python3-tk libldap2-dev libsasl2-dev
# Install Node.js 20 and yarn
curl -fsSL https://deb.nodesource.com/setup_20.x | sudo bash -
sudo apt-get install -y nodejs
sudo npm install --global yarn
MacOS 10.15
brew install git python pyenv redis curl openssl node sqlite3 geos
Arch Linux
# Update the system and AUR (you can use any other AUR helper of choice) first:
sudo pacman -Syyu
pikaur -Syu
# Install the required dependencies:
sudo pacman -S base-devel curl git redis cmake gcc python python-pip tk libldap libsasl pkgconf ffmpeg geos openldap
# CVAT supports only Python 3.10, so install it if you don’t have it:
pikaur -S python310
# Install Node.js, yarn and npm
sudo pacman -S nodejs-lts-gallium yarn npm
-
Install Chrome
-
Install VS Code.
-
Install the following VScode extensions:
-
Make sure to use Python 3.10.0 or higher
python3 --version
-
Install CVAT on your local host:
git clone https://github.com/cvat-ai/cvat
cd cvat && mkdir logs keys
python3 -m venv .env
. .env/bin/activate
pip install -U pip wheel setuptools
pip install -r cvat/requirements/development.txt
Note that the .txt files in the cvat/requirements directory
have pinned dependencies intended for the main target OS/Python version
(the one used in the main Dockerfile).
If you’re unable to install those dependency versions,
you can substitute the corresponding .in files instead.
That way, you’re more likely to be able to install the dependencies,
but their versions might not correspond to those used in production.
Note for Mac users
If you have any problems with installing dependencies from
cvat/requirements/*.txt, you may need to reinstall your system python
In some cases after system update it can be configured incorrectly and cannot compile
some native modules
Make sure Homebrew lib path is in DYLD_LIBRARY_PATH.
For Apple Silicon: export DYLD_LIBRARY_PATH=/opt/homebrew/lib:$DYLD_LIBRARY_PATH
Homebrew will install FFMpeg 5.0 by default, which does not work, so you should install 4.X.
You can install older 4.X FFMpeg using Homebrew like that:
 cd "$(brew --repo homebrew/core)"
 git checkout addd616edc9134f057e33694c420f4900be59db8
 brew unlink ffmpeg
 HOMEBREW_NO_AUTO_UPDATE=1 brew install ffmpeg
 git checkout master
if you are still facing error Running setup.py install for av ... error, you may
try more radical variant
 cd "$(brew --repo homebrew/core)"
 git checkout addd616edc9134f057e33694c420f4900be59db8
 brew uninstall ffmpeg --force
 HOMEBREW_NO_AUTO_UPDATE=1 brew install ffmpeg
 git checkout master
If you faced with error Failed building wheel for h5py, you may need install hdf5
brew install hdf5
export HDF5_DIR="$(brew --prefix hdf5)"
pip install --no-binary=h5py h5py
If you faced with error
OSError: Could not find library geos_c or load any of its variants ['libgeos_c.so.1', 'libgeos_c.so'].
You may fix this using
sudo ln -s /opt/homebrew/lib/libgeos_c.dylib /usr/local/lib
Note for Arch Linux users:
Because PyAV as of version 10.0.0 already works
with FFMPEG5, you may consider changing the av version requirement
in /cvat/cvat/requirements/base.txt to 10.0.0 or higher.
Perform this action before installing cvat requirements from the list mentioned above.
-
Install Docker Engine and Docker Compose
-
Start service dependencies:
docker compose -f docker-compose.yml -f docker-compose.dev.yml up -d --build \
  cvat_opa cvat_db cvat_redis_inmem cvat_redis_ondisk cvat_server
Note: this runs an extra copy of the CVAT server in order to supply rules to OPA.
If you update the OPA rules, rerun this command to recreate the server image and container.
Note: to stop these services, use
docker compose -f docker-compose.yml -f docker-compose.dev.yml down.
You can add -v to remove the data, as well.
-
Apply migrations and create a super user for CVAT:
python manage.py migrate
python manage.py collectstatic
python manage.py createsuperuser
-
Install npm packages for UI (run the following command from CVAT root directory):
Note for Mac users
If you faced with error
Node Sass does not yet support your current environment: OS X 64-bit with Unsupported runtime (57)
Read this article Node Sass does not yet support your current environment
Run CVAT
-
Start npm UI debug server (run the following command from CVAT root directory):
- If you want to run CVAT in localhost:
- If you want to access CVAT from outside of your host:
CVAT_UI_HOST='<YOUR_HOST_IP>' yarn run start:cvat-ui
-
Open a new terminal window.
-
Run VScode from the virtual environment (run the following command from CVAT root directory):
source .env/bin/activate && code
-
Inside VScode, Open CVAT root dir
-
Select server: debug configuration and run it (F5) to run REST server and its workers
-
Make sure that Uncaught Exceptions option under breakpoints section is unchecked
-
If you choose to run CVAT in localhost: Select server: chrome configuration and run it (F5) to open CVAT in Chrome
-
Alternative: If you changed CVAT_UI_HOST just enter <YOUR_HOST_IP>:3000 in your browser.
Note for Mac users
You may have a permission denied problem starting the server because AirPlay Receiver running on port 5000/7000.
Turn off AirPlay Receiver:
Go to System Settings → General → AirDrop & Handoff → Untick Airplay Receiver.
You have done! Now it is possible to insert breakpoints and debug server and client of the tool.
Instructions for running tests locally are available here.
Note for Windows users
You develop CVAT under WSL (Windows subsystem for Linux) following next steps.
-
Install WSL using this guide.
-
Following this guide install Ubuntu 18.04 Linux distribution for WSL.
-
Run Ubuntu using start menu link or execute next command
-
Run all commands from this installation guide in WSL Ubuntu shell.
-
You might have to manually start the redis server in wsl before you can start the configuration inside
Visual Studio Code. You can do this with sudo service redis-server start. Alternatively you can also
use a redis docker image instead of using the redis-server locally.
Note for Mac users
- You might have to manually start the redis server. You can do this with
redis-server.
Alternatively you can also use a redis docker image instead of using the redis-server locally.
Note for Arch Linux users
- You need to start
redis and docker services manually in order to begin debugging/running tests:
sudo systemctl start redis.service
sudo systemctl start docker.service
CVAT Analytics Ports
In case you cannot access analytics, check if the following ports are open:
cvat_vector:
    ports:
      - '8282:80'

  cvat_clickhouse:
    ports:
      - '8123:8123'
In addition, you can completely disable analytics if you don’t need it by deleting the following data from
launch.json:
  "DJANGO_LOG_SERVER_HOST": "localhost",
  "DJANGO_LOG_SERVER_PORT": "8282"
Analytics on GitHub:
Analytics Components
2 - Setup additional components in development environment
Deploying a DL model as a serverless function and Cypress tests.
DL models as serverless functions
Follow this guide to install Nuclio:
- You have to install
nuctl command line tool to build and deploy serverless
functions.
- The simplest way to explore Nuclio is to run its graphical user interface (GUI)
of the Nuclio dashboard. All you need in order to run the dashboard is Docker. See
nuclio documentation
for more details.
- Deploy a couple of functions.
This will automatically create a
cvat Nuclio project to contain the functions.
./serverless/deploy_cpu.sh serverless/openvino/dextr
./serverless/deploy_cpu.sh serverless/openvino/omz/public/yolo-v3-tf
- Display a list of running serverless functions using
nuctl command or see them
in nuclio dashboard:
  NAMESPACE |                             NAME                              | PROJECT | STATE | NODE PORT | REPLICAS
  nuclio    | openvino-dextr                                                | cvat    | ready |     55274 | 1/1
  nuclio    | openvino-omz-public-yolo-v3-tf                                | cvat    | ready |     57308 | 1/1
- Test your deployed DL model as a serverless function. The command below
should work on Linux and Mac OS.
image=$(curl https://upload.wikimedia.org/wikipedia/en/7/7d/Lenna_%28test_image%29.png --output - | base64 | tr -d '\n')
cat << EOF > /tmp/input.json
{"image": "$image"}
EOF
cat /tmp/input.json | nuctl invoke openvino-omz-public-yolo-v3-tf -c 'application/json'
23.05.11 22:14:17.275    nuctl.platform.invoker (I) Executing function {"method": "POST", "url": "http://0.0.0.0:32771", "bodyLength": 631790, "headers": {"Content-Type":["application/json"],"X-Nuclio-Log-Level":["info"],"X-Nuclio-Target":["openvino-omz-public-yolo-v3-tf"]}}
23.05.11 22:14:17.788    nuctl.platform.invoker (I) Got response {"status": "200 OK"}
23.05.11 22:14:17.789                     nuctl (I) >>> Start of function logs
23.05.11 22:14:17.789 ino-omz-public-yolo-v3-tf (I) Run yolo-v3-tf model {"worker_id": "0", "time": 1683828857301.8765}
23.05.11 22:14:17.789                     nuctl (I) <<< End of function logs

> Response headers:
Server = nuclio
Date = Thu, 11 May 2023 18:14:17 GMT
Content-Type = application/json
Content-Length = 100

> Response body:
[
    {
        "confidence": "0.9992254",
        "label": "person",
        "points": [
            39,
            124,
            408,
            512
        ],
        "type": "rectangle"
    }
]
Run Cypress tests
- Install Cypress as described in the documentation.
- Run cypress tests:
    cd <cvat_local_repository>/tests
    <cypress_installation_directory>/node_modules/.bin/cypress run --headless --browser chrome
For more information, see the documentation.
3 - Coding style
Information about coding style that is used in CVAT development.
We use the Airbnb JavaScript Style Guide
for JavaScript/TypeScript code with a little exception - we prefer 4 spaces
for indentation of nested blocks and statements.
For Python, we use Black and
isort to enforce the coding style and autoformat files.
Currently, not all components implement formatting, the actual information about the enabled
components is available in the CI checks here
and in the formatting script at dev/format_python_code.sh.
4 - Branching model
Information about the branching model that is used in the project.
The project uses a successful Git branching model.
Thus it has a couple of branches. Some of them are described below:
-
origin/master to be the main branch where the source code of
HEAD always reflects a production-ready state
-
origin/develop to be the main branch where the source code of
HEAD always reflects a state with the latest delivered development
changes for the next release. Some would call this the “integration branch”.
5 - Using the issue tracker
Information and rules for using the issue tracker.
The issue tracker is the preferred channel for bug reports,
features requests and submitting pull
requests, but please respect the following restrictions:
6 - Bug reports
Guidelines and an example of how to report a bug.
A bug is a demonstrable problem that is caused by the code in the repository.
Good bug reports are extremely helpful - thank you!
Guidelines for bug reports:
-
Use the GitHub issue search — check if the issue has already been
reported.
-
Check if the issue has been fixed — try to reproduce it using the
latest develop branch in the repository.
-
Isolate the problem — ideally create a reduced test case.
A good bug report shouldn’t leave others needing to chase you up for more
information. Please try to be as detailed as possible in your report. What is
your environment? What steps will reproduce the issue? What browser(s) and OS
experience the problem? What would you expect to be the outcome? All these
details will help people to fix any potential bugs.
Example:
Short and descriptive example bug report title
A summary of the issue and the browser/OS environment in which it occurs. If
suitable, include the steps required to reproduce the bug.
- This is the first step
- This is the second step
- Further steps, etc.
Any other information you want to share that is relevant to the issue being
reported. This might include the lines of code that you have identified as
causing the bug, and potential solutions (and your opinions on their
merits).
7 - Feature requests
Information on requesting new features.
Feature requests are welcome. But take a moment to find out whether your idea
fits with the scope and aims of the project. It’s up to you to make a strong
case to convince the project’s developers of the merits of this feature. Please
provide as much detail and context as possible.
8 - Pull requests
Instructions on how to create a pull request.
Good pull requests - patches, improvements, new features - are a fantastic
help. They should remain focused in scope and avoid containing unrelated
commits.
Please ask first before embarking on any significant pull request (e.g.
implementing features, refactoring code, porting to a different language),
otherwise you risk spending a lot of time working on something that the
project’s developers might not want to merge into the project.
Please adhere to the coding conventions used throughout a project (indentation,
accurate comments, etc.) and any other requirements (such as test coverage).
Follow this process if you’d like your work considered for inclusion in the
project:
-
Fork the project, clone your fork,
and configure the remotes:
# Clone your fork of the repo into the current directory
git clone https://github.com/<your-username>/<repo-name>
# Navigate to the newly cloned directory
cd <repo-name>
# Assign the original repo to a remote called "upstream"
git remote add upstream https://github.com/<upstream-owner>/<repo-name>
-
If you cloned a while ago, get the latest changes from upstream:
git checkout <dev-branch>
git pull upstream <dev-branch>
-
Create a new topic branch (off the main project development branch) to
contain your feature, change, or fix:
git checkout -b <topic-branch-name>
-
Commit your changes in logical chunks. Please adhere to these git commit
message guidelines
or your code is unlikely be merged into the main project. Use Git’s
interactive rebase
feature to tidy up your commits before making them public.
-
Locally merge (or rebase) the upstream development branch into your topic branch:
git pull [--rebase] upstream <dev-branch>
-
Push your topic branch up to your fork:
git push origin <topic-branch-name>
-
Open a Pull Request
with a clear title and description.
IMPORTANT: By submitting a patch, you agree to allow the project owner to
license your work under the same license as that used by the project.
9 - How to add a new annotation format support
Instructions on adding support for new annotation formats. This section on
GitHub.
- Add a python script to
dataset_manager/formats
- Add an import statement to registry.py.
- Implement some importers and exporters as the format requires.
Each format is supported by an importer and exporter.
It can be a function or a class decorated with
importer or exporter from registry.py.
Examples:
@importer(name="MyFormat", version="1.0", ext="ZIP")
def my_importer(file_object, task_data, **options):
  ...

@importer(name="MyFormat", version="2.0", ext="XML")
class my_importer(file_object, task_data, **options):
  def __call__(self, file_object, task_data, **options):
    ...

@exporter(name="MyFormat", version="1.0", ext="ZIP"):
def my_exporter(file_object, task_data, **options):
  ...
Each decorator defines format parameters such as:
Importer arguments:
- file_object - a file with annotations or dataset
- task_data - an instance of
TaskData class.
Exporter arguments:
-
file_object - a file for annotations or dataset
-
task_data - an instance of TaskData class.
-
options - format-specific options. save_images is the option to
distinguish if dataset or just annotations are requested.
TaskData provides
many task properties and interfaces to add and read task annotations.
Public members:
-
TaskData. Attribute - class, namedtuple('Attribute', 'name, value')
-
TaskData. LabeledShape - class, namedtuple('LabeledShape', 'type, frame, label, points, occluded, attributes, group, z_order')
-
TrackedShape - namedtuple('TrackedShape', 'type, points, occluded, frame, attributes, outside, keyframe, z_order')
-
Track - class, namedtuple('Track', 'label, group, shapes')
-
Tag - class, namedtuple('Tag', 'frame, label, attributes, group')
-
Frame - class, namedtuple('Frame', 'frame, name, width, height, labeled_shapes, tags')
-
TaskData. shapes - property, an iterator over LabeledShape objects
-
TaskData. tracks - property, an iterator over Track objects
-
TaskData. tags - property, an iterator over Tag objects
-
TaskData. meta - property, a dictionary with task information
-
TaskData. group_by_frame() - method, returns
an iterator over Frame objects, which groups annotation objects by frame.
Note that TrackedShape s will be represented as LabeledShape s.
-
TaskData. add_tag(tag) - method,
tag should be an instance of the Tag class
-
TaskData. add_shape(shape) - method,
shape should be an instance of the Shape class
-
TaskData. add_track(track) - method,
track should be an instance of the Track class
Sample exporter code:
...
# dump meta info if necessary
...
# iterate over all frames
for frame_annotation in task_data.group_by_frame():
  # get frame info
  image_name = frame_annotation.name
  image_width = frame_annotation.width
  image_height = frame_annotation.height
  # iterate over all shapes on the frame
  for shape in frame_annotation.labeled_shapes:
    label = shape.label
    xtl = shape.points[0]
    ytl = shape.points[1]
    xbr = shape.points[2]
    ybr = shape.points[3]
    # iterate over shape attributes
    for attr in shape.attributes:
      attr_name = attr.name
      attr_value = attr.value
...
# dump annotation code
file_object.write(...)
...
Sample importer code:
...
#read file_object
...
for parsed_shape in parsed_shapes:
  shape = task_data.LabeledShape(
    type="rectangle",
    points=[0, 0, 100, 100],
    occluded=False,
    attributes=[],
    label="car",
    outside=False,
    frame=99,
  )
task_data.add_shape(shape)
10 - Server Profiling
Tutorial about how to profile the server
Below you can find just quick overview of the
Django Silk profiler.
Please read Silk documentation
for more information about its features.
Silk is a live profiling and inspection tool for the Django framework.
Silk intercepts and stores HTTP requests and database queries before
presenting them in a user interface for further inspection:
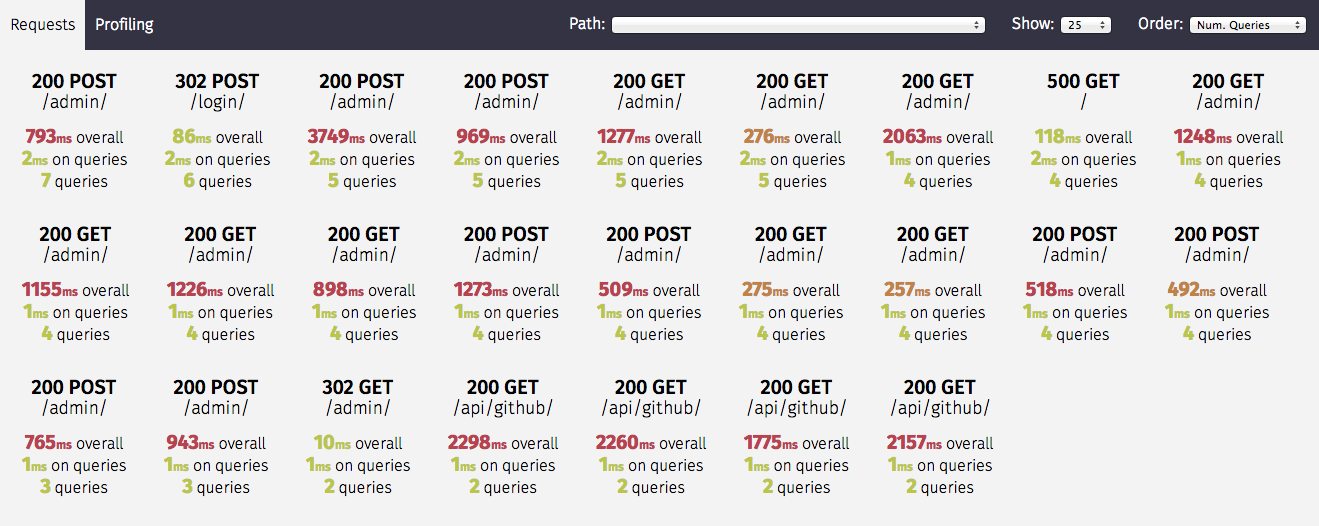
Primary features:
- Request Inspection
- SQL Inspection
- Profiling of python code
Silk is available in the development configuration of CVAT server for
authenticated users: http://localhost:3000/profiler/.
11 - Running tests
Instructions on how to run all existence tests.
E2E tests
Initial steps:
- Run CVAT instance:
docker compose \
          -f docker-compose.yml \
          -f docker-compose.dev.yml \
          -f components/serverless/docker-compose.serverless.yml \
          -f tests/docker-compose.minio.yml \
          -f tests/docker-compose.file_share.yml up -d
- Add test user in CVAT:
docker exec -i cvat_server \
          /bin/bash -c \
          "echo \"from django.contrib.auth.models import User; User.objects.create_superuser('admin', 'admin@localhost.company', '12qwaszx')\" | python3 ~/manage.py shell"
- Install npm dependencies:
cd tests
yarn --frozen-lockfile
If you want to get a code coverage report, instrument the code:
yarn --frozen-lockfile
yarn run coverage
Running tests
yarn run cypress:run:chrome
yarn run cypress:run:chrome:canvas3d
REST API, SDK and CLI tests
Initial steps
- Follow this guide to prepare
cvat-sdk and cvat-cli source code
- Install all necessary requirements before running REST API tests:
pip install -r ./tests/python/requirements.txt
pip install -e ./cvat-sdk
pip install -e ./cvat-cli
- Stop any other CVAT containers which you run previously. They keep ports
which are used by containers for the testing system.
Running tests
Run all REST API tests:
pytest ./tests/python
This command will automatically start all necessary docker containers.
If you want to start/stop these containers without running tests
use special options for it:
pytest ./tests/python --start-services
pytest ./tests/python --stop-services
If you need to rebuild your CVAT images add --rebuild option:
pytest ./tests/python --rebuild
If you want to get a code coverage report, use special option for it:
COVERAGE_PROCESS_START=.coveragerc pytest ./tests/python --rebuild --cov --cov-report xml
Debugging
Currently, this is only supported in deployments based on Docker Compose,
which should be enough to fix errors arising in REST API tests.
To debug a server deployed with Docker, you need to do the following:
CVAT_DEBUG_ENABLED=yes pytest --rebuild --start-services tests/python
Now, you can use VS Code tasks to attach to the running server containers.
To attach to a container, run one of the following tasks:
REST API tests: Attach to server for the server containerREST API tests: Attach to RQ low for the low priority queue workerREST API tests: Attach to RQ default for the default priority queue worker
If you have a custom development environment setup, you need to adjust
host-remote path mappings in the .vscode/launch.json:
...
"pathMappings": [
   {
      "localRoot": "${workspaceFolder}/my_venv",
      "remoteRoot": "/opt/venv",
   },
   {
      "localRoot": "/some/other/path",
      "remoteRoot": "/some/container/path",
   }
]
Extra options:
- If you want the server to wait for a debugger on startup,
use the
CVAT_DEBUG_WAIT_CLIENT environment variable:
CVAT_DEBUG_WAIT_CLIENT=yes pytest ...
- If you want to change the default debugging ports, check the
*_DEBUG_PORT
variables in the docker-compose.dev.yml
Unit tests
Initial steps
- Install necessary Python dependencies:
pip install -r cvat/requirements/testing.txt
- Install npm dependencies:
yarn --frozen-lockfile
- Build CVAT server image
docker compose -f docker-compose.yml -f docker-compose.dev.yml build cvat_server
- Run cvat_opa container
docker compose -f docker-compose.yml -f docker-compose.dev.yml up -d cvat_opa
Running tests
- Python tests
python manage.py test --settings cvat.settings.testing cvat/apps -v 2
If you want to get a code coverage report, run the next command:
coverage run manage.py test --settings cvat.settings.testing cvat/apps -v 2
- JS tests
cd cvat-core
yarn run test
Debug python unit tests
- Run
server: tests debug task in VSCode
- If you want to debug particular tests then change the configuration
of the corresponding task in
./vscode/launch.json, for example:
{
    "name": "server: tests",
    "type": "python",
    "request": "launch",
    "justMyCode": false,
    "stopOnEntry": false,
    "python": "${command:python.interpreterPath}",
    "program": "${workspaceRoot}/manage.py",
    "args": [
        "test",
        "--settings",
        "cvat.settings.testing",
        "cvat/apps/engine",
        "-v", "2",
        "-k", "test_api_v2_projects_",
    ],
    "django": true,
    "cwd": "${workspaceFolder}",
    "env": {},
    "console": "internalConsole"
}
IAM and Open Policy Agent tests
Generate tests
python cvat/apps/iam/rules/tests/generate_tests.py
Run testing
docker compose run --rm -v "$PWD:/mnt/src:ro" -w /mnt/src \
    cvat_opa test -v cvat/apps/*/rules
curl -L -o opa https://openpolicyagent.org/downloads/v0.63.0/opa_linux_amd64_static
chmod +x ./opa
./opa test cvat/apps/*/rules
Linting Rego
The Rego policies in this project are linted using Regal.
docker run --rm -v ${PWD}:/mnt/src:ro -w /mnt/src \
    ghcr.io/styrainc/regal:0.11.0 \
    lint cvat/apps/*/rules
- or execute Regal directly
curl -L -o regal https://github.com/StyraInc/regal/releases/download/v0.11.0/regal_Linux_x86_64
chmod +x ./regal
./regal lint cvat/apps/*/rules
12 - Repository structure
How to find the components needed
CVAT stores all its components is a single (“monolithic”) repository.
An explanation of CVAT components is available here.
Here is the list of the main directories and files in the repository:
./ - Various common files for the repository.github/ - GitHub configuration files.vscode/ - VS Code configuration filescomponents/ - optional server servicescvat/ - server source code
apps/ - server modules sourcesrequirements/ - server Python package requirementssettings/ - server configurations
cvat-canvas/ - UI package, responsible for the annotation canvascvat-canvas3d/ - UI package, responsible for the annotation canvas for 3Dcvat-cli/ - CLI utilitycvat-core/ - UI package, responsible for server interactioncvat-data/ - UI package, responsible for media data decodingcvat-sdk/ - Python SDK packagecvat-ui/ - UI package, responsible for UI elementshelm-chart/ - Helm configuration for deployment on Kubernetesserverless/ - AI modelssite/ - Documentation website sources
assets/ - Media contentcontent/ - Documentation pages
supervisord/ - supervisord deployment configurationtests/ - End-to-end tests
cypress/ - UI end-to-end testspython/ - Tests for server, SDK, CLI and other Python components
utils/ - Additional tools and utility scripts
dataset_manifest/ - Python library and a tool to create dataset manifest filesdicom_converter/ - Script to convert DICOM data to CVAT-compatible format
docker-compose*.yml - Docker Compose local deployment configurationDockerfile* - Docker image descriptionsmanage.py - Django utility to manipulate server components