CVAT Complete Workflow Guide for Organizations
Welcome to CVAT.ai, this page is the place to start your team’s annotation process using the Computer Vision Annotation Tool (CVAT).
This guide aims to equip your organization with the knowledge and best practices needed to use CVAT effectively.
We’ll walk you through every step of the CVAT workflow, from initial setup to advanced features.
See:
Workflow diagram
The workflow diagram presents an overview of the general process at a high level.
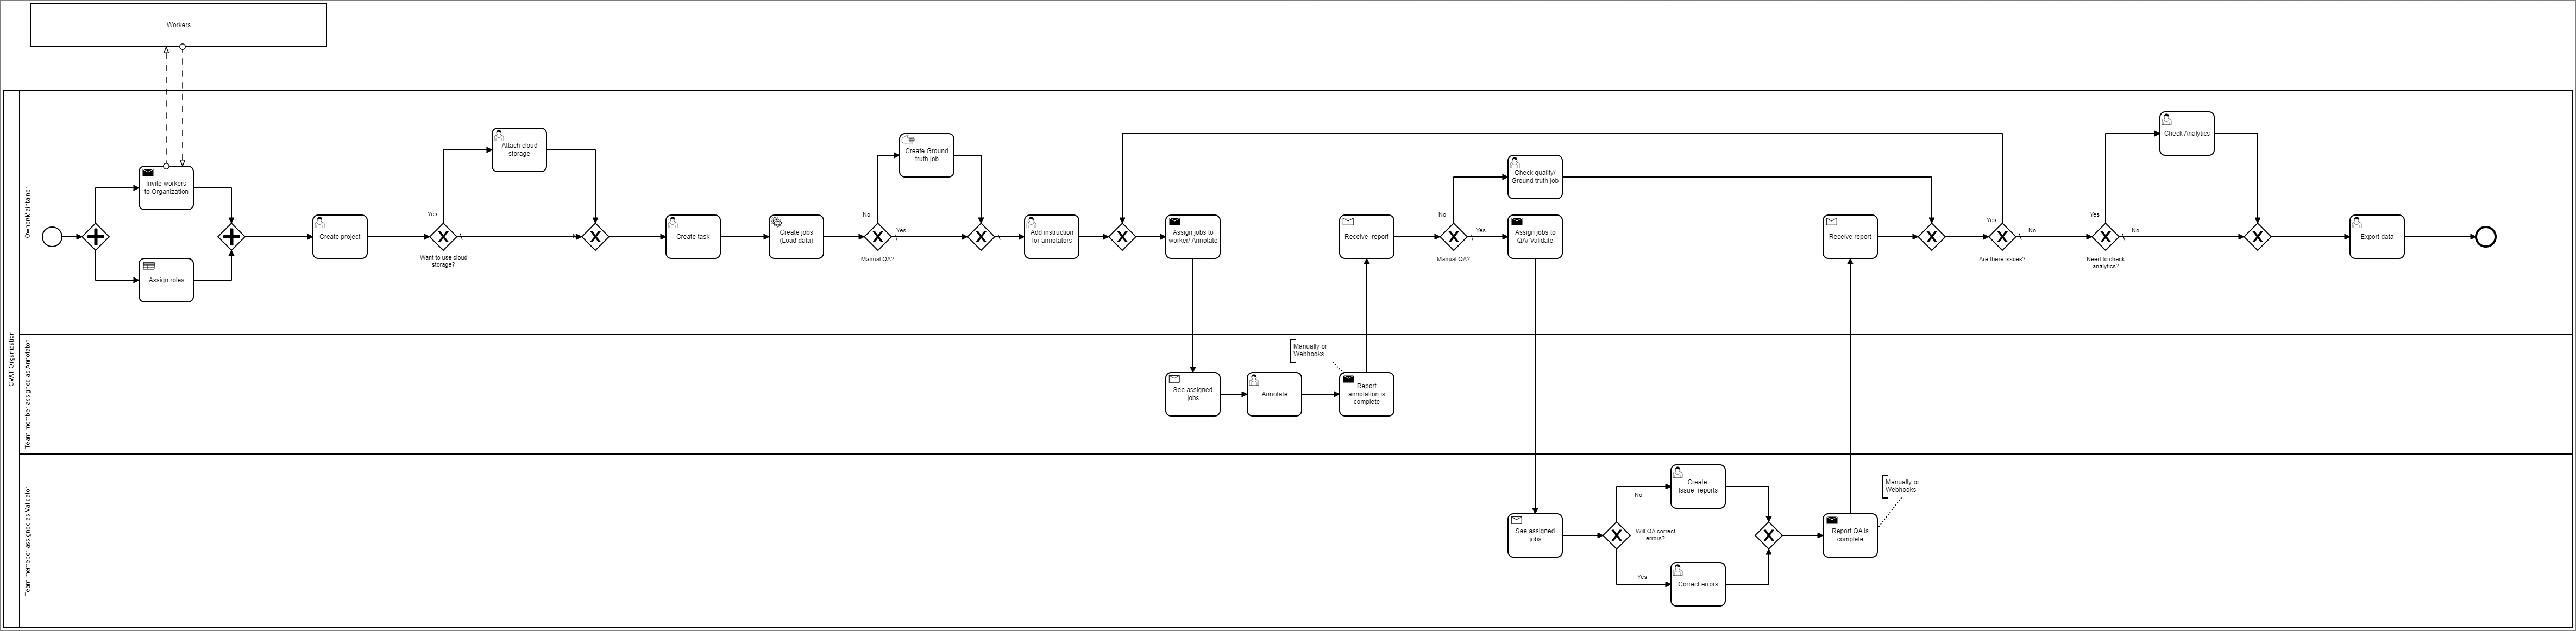
End-to-end workflow for Organizations
To use CVAT within your organization, please follow these steps:
- Create an account in CVAT.
- Create Organization.
- Switch to the Organization that you’ve created and subscribe to the Team plan.
- Invite members to Organization and assign User roles to invited members.
- Create Project.
- (Optional) Attach Cloud storages to the Project.
- Create Task or
Multitask.
At this step the CVAT platform will automatically create jobs. - (Optional) Create Ground truth job.
This step can be skipped if you’re employing a manual QA approach. - (Optional) Add Instructions for annotators.
- (Optional) Configure Webhooks.
- Assign jobs to annotators by adding the annotator name to Assignee and changing the Job stage to Annotation.
- Annotator will see assigned jobs and annotate them.
- (Optional) In case you’ve created a Ground truth job give the CVAT platform some time to accumulate the data and check the accuracy of the annotation.
- If you are using the manual validation, assign jobs to validators by adding the validator name to Assignee and changing the Job stage to Validation.
- Validator will see assigned jobs and report issues.
Note, that validators can correct issues, see Manual QA and Review - Check issues and if there is a need for additional improvement, reassign jobs to either the Validator or Annotator.
- (Optional) Check Analytics.
- Export Data.