Contextual images
Contextual images are additional images that provide context or additional information related to the primary image.
Use them to add extra contextual about the object to improve the accuracy of annotation.
Contextual images are available for 2D and 3D tasks.
See:
Folder structure
To add contextual images to the task, you need to organize the images folder.
Before uploading the archive to CVAT, do the following:
- In the folder with the images for annotation, create a folder:
related_images. - Add to the
related_imagesa subfolder with the same name as the primary image to which it should be linked. - Place the contextual image(s) within the subfolder created in step 2.
- Add folder to the archive.
- Create task.
Data format
Example file structure for 2D and 3D tasks:
  root_directory
    image_1_to_be_annotated.jpg
    image_2_to_be_annotated.jpg
    related_images/
      image_1_to_be_annotated_jpg/
        context_image_for_image_1.jpg
      image_2_to_be_annotated_jpg/
        context_image_for_image_2.jpg
     subdirectory_example/
        image_3_to_be_annotated.jpg
         related_images/
          image_3_to_be_annotated_jpg/
             context_image_for_image_3.jpg
root_directory
pointcloud/
image_1_to_be_annotated.pcd
image_2_to_be_annotated.pcd
related_images/
image_1_to_be_annotated_pcd/
context_image_for_image_1.jpg
image_2_to_be_annotated_pcd/
context_image_for_image_2.jpg /any_directory
pointcloud.pcd
pointcloud.jpg
/any_other_directory
/any_subdirectory
pointcloud.pcd
pointcloud.png /image_00
/data
/0000000000.png
/0000000001.png
/0000000002.png
/0000000003.png
/image_01
/data
/0000000000.png
/0000000001.png
/0000000002.png
/0000000003.png
/image_02
/data
/0000000000.png
/0000000001.png
/0000000002.png
/0000000003.png
/image_N
/data
/0000000000.png
/0000000001.png
/0000000002.png
/0000000003.png
/velodyne_points
/data
/0000000000.bin
/0000000001.bin
/0000000002.bin
/0000000003.bin- For KITTI:
image_00,image_01,image_02,image_N, (whereNis any number <= 12) are context images. - For 3D option 3: a regular image file placed near a .pcd file with the same name is considered to be a context image.
For more general information about 3D data formats, see 3D data formats.
Contextual images
The maximum amount of contextual images is twelve.
By default they will be positioned on the right side of the main image.
Note: By default, only three contextual images will be visible.
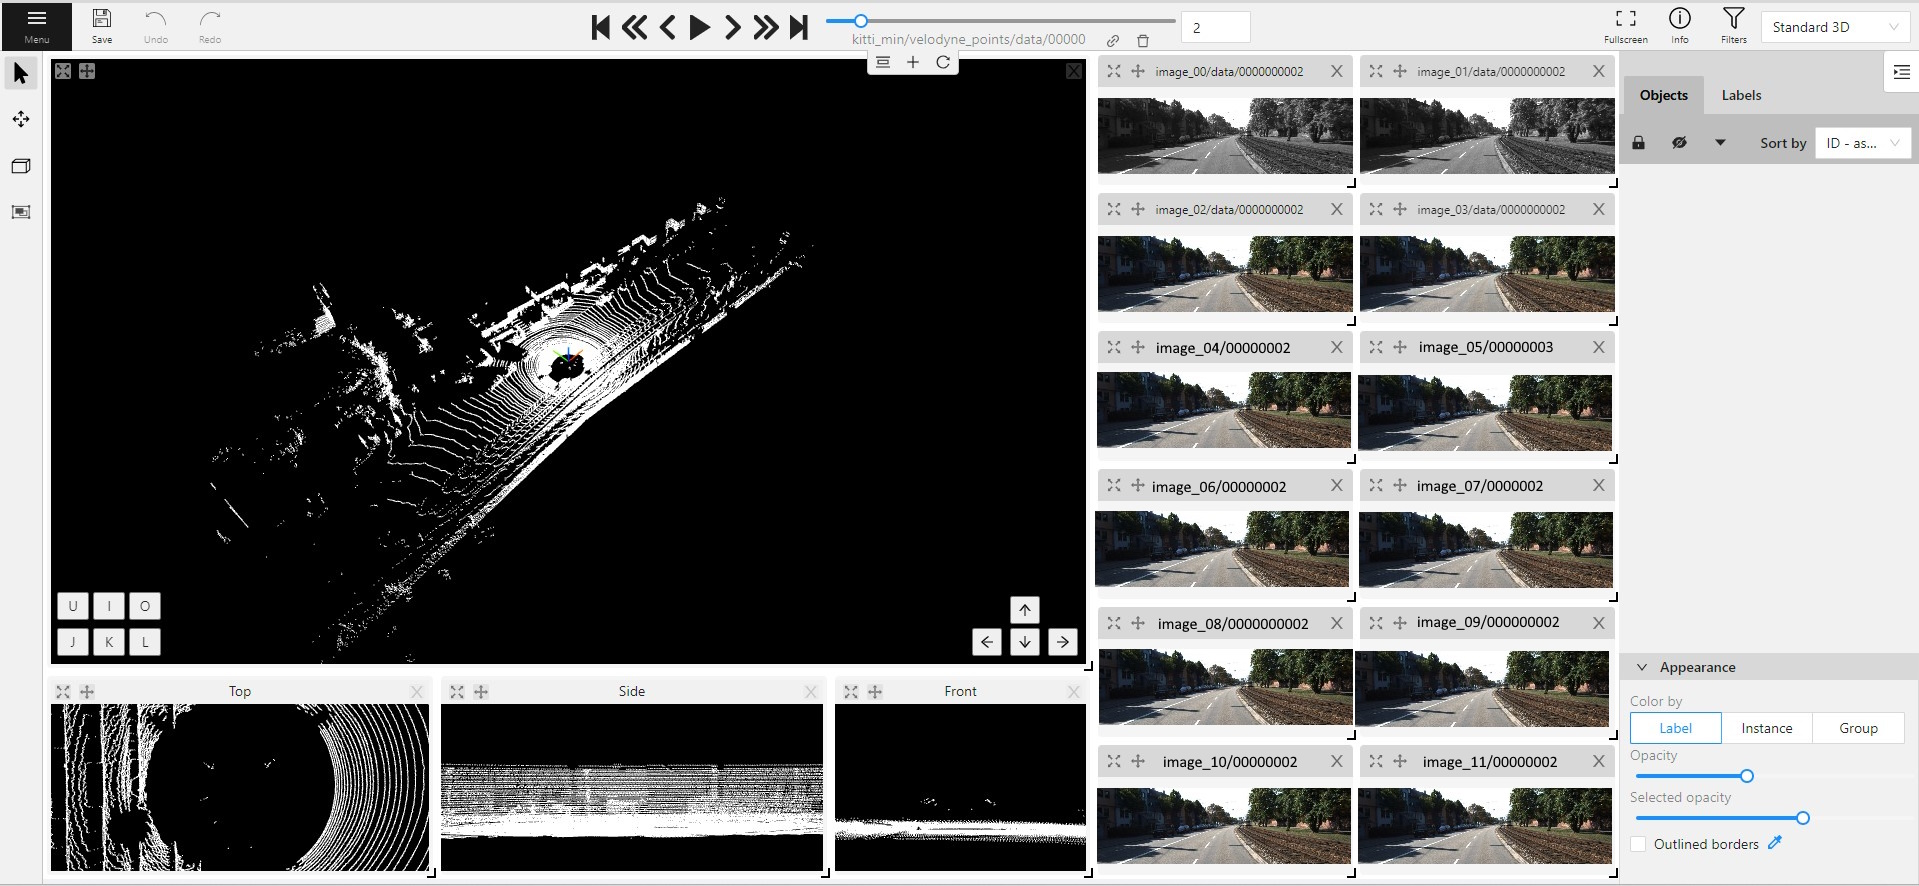
When you add contextual images to the set, small toolbar will appear on the top of the screen, with the following elements:
| Element | Description |
|---|---|
 |
Fit views. Click to restore the layout to its original appearance. If you’ve expanded any images in the layout, they will returned to their original size. This won’t affect the number of context images on the screen. |
 |
Add new image. Click to add context image to the layout. |
 |
Reload layout. Click to reload layout to the default view. Note, that this action can change the number of context images resetting them back to three. |
Each context image has the following elements:
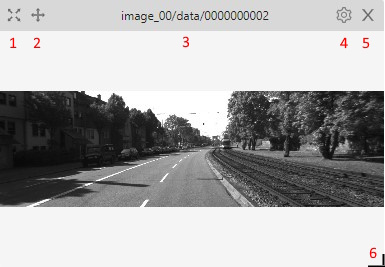
| Element | Description |
|---|---|
| 1 | Full screen. Click to expand the contextual image in to the full screen mode. Click again to revert contextual image to windowed mode. |
| 2 | Move contextual image. Hold and move contextual image to the other place on the screen.
|
| 3 | Name. Unique contextual image name |
| 4 | Select contextual image. Click to open a horisontal listview of all available contextual images. Click on one to select. |
| 5 | Close. Click to remove image from contextual images menu. |
| 6 | Extend Hold and pull to extend the image. |