Manual QA and Review
In the demanding process of annotation, ensuring accuracy is paramount.
CVAT introduces a specialized Review mode, designed to streamline the validation of annotations by pinpointing errors or discrepancies in annotation.
Note: The Review mode is not applicable for 3D tasks.
See:
- Review and report issues: review only mode
- Review and report issues: review and correct mode
- Issues navigation and interface
- Manual QA complete video tutorial
Review and report issues: review only mode
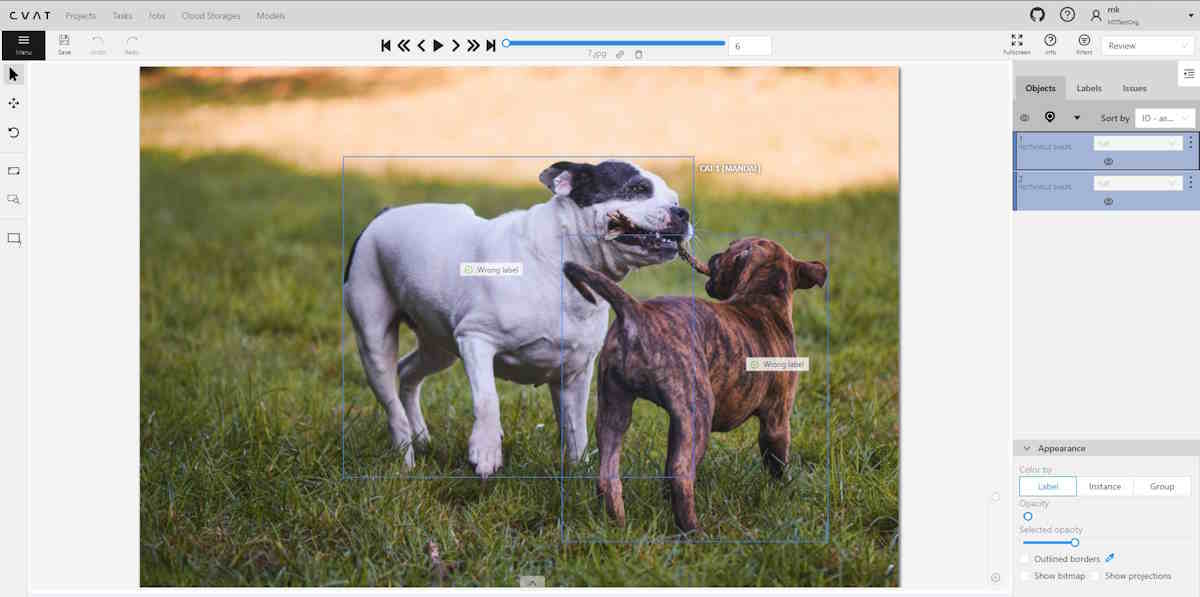
Review mode is a user interface (UI) setting where a specialized Issue tool is available. This tool allows you to identify and describe issues with objects or areas within the frame.
Note: While in review mode, all other tools will be hidden.
Review mode screen looks like the following:
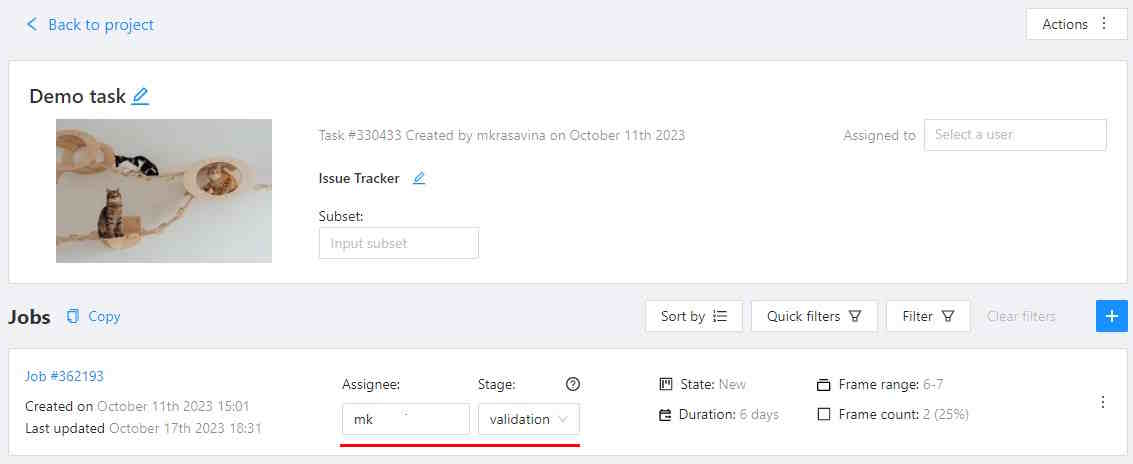
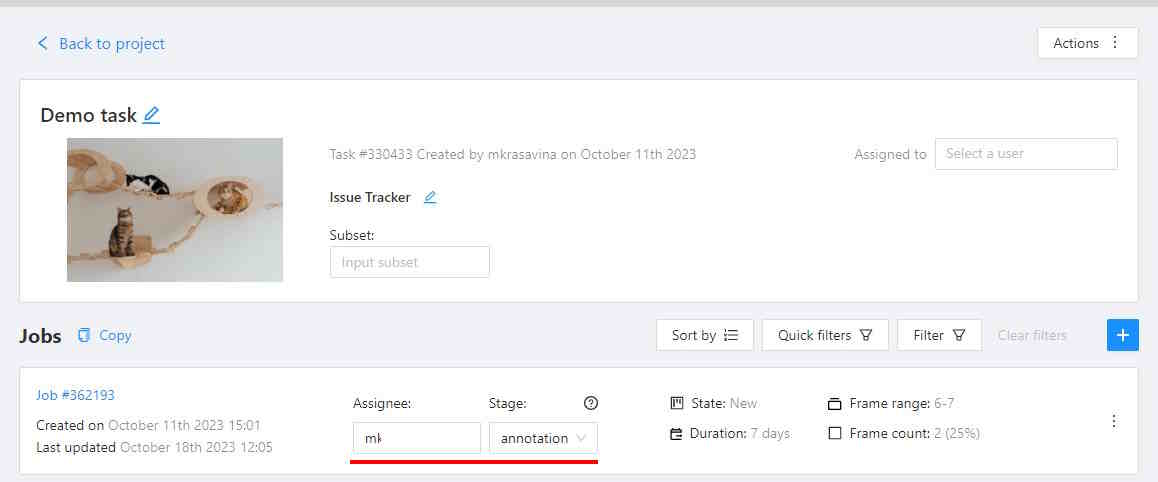
Assigning reviewer
Note: Reviewers can be assigned by project or task owner, assignee, and maintainer.
To assign a reviewer to the job, do the following:
-
Log in to the Owner or Maintainer account.
-
(Optional) If the person you wish to assign as a reviewer is not a member of Organization, you need to Invite this person to the Organization.
-
Click on the Assignee field and select the reviewer.
-
From the Stage drop-down list, select Validation.
Reporting issues
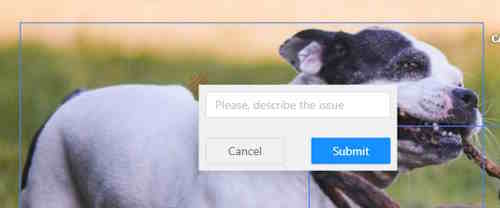
To report an issue, do the following:
-
Log in to the reviewer’s account.
-
On the Controls sidebar, click Open and issue (
 ).
). -
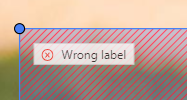
Click on the area of the frame where the issue is occurring, and the Issue report popup will appear.
-
In the text field of the Issue report popup, enter the issue description.
-
Click Submit.
Quick issue
The Quick issue function streamlines the review process. It allows reviewers to efficiently select from a list of previously created issues or add a new one, facilitating a faster and more organized review.
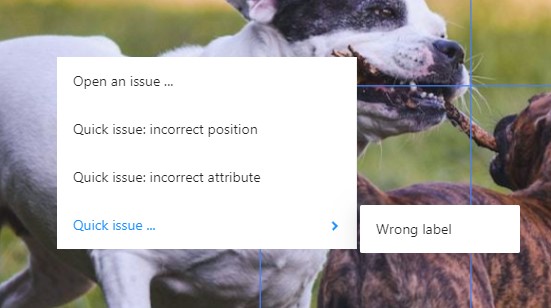
To create a Quick issue do the following:
-
Right-click on the area of the frame where the issue is occurring.
-
From the popup menu select one of the following:
- Open an issue…: to create new issue.
- Quick issue: incorrect position: to report incorrect position of the label.
- Quick issue: incorrect attribute: to report incorrect attribute of the label.
- Quick issue…: to open the list of issues that were reported by you before.
Assigning corrector
Note: Only project owners and maintainers can assign reviewers.
To assign a corrector to the job, do the following:
-
Log in to the Owner or Maintainer account.
-
(Optional) If the person you wish to assign as a corrector is not a member of Organization, you need to Invite this person to the Organization.
-
Click on the Assignee field and select the reviewer.
-
From the Stage drop-down list, select Annotation.
Correcting reported issues
To correct the reported issue, do the following:
-
Log in to the corrector account.
-
Go to the reviewed job and open it.
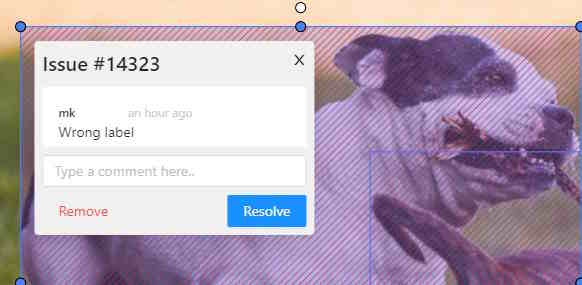
-
Click on the issue report, to see details of what needs to be corrected.
-
Correct annotation.
-
Add a comment to the issue report and click Resolve.
-
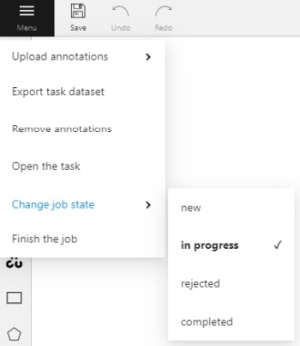
After all issues are fixed save work, go to the Menu select the Change the job state and change state to Complete.
Review and report issues: review and correct mode
The person, assigned as assigned as reviewer can switch to correction mode and correct all annotation issues.
To correct annotation issues as a reviewer, do the following:
-
Log in to the reviewer account.
-
Go to the assigned job and open it.
-
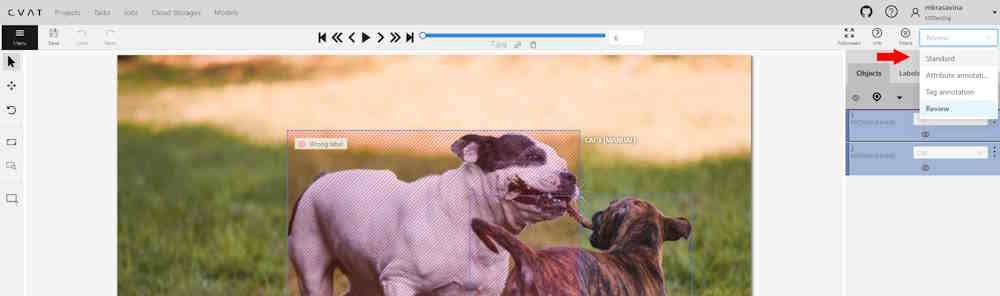
In the top right corner, from the drop-down list, select Standard.
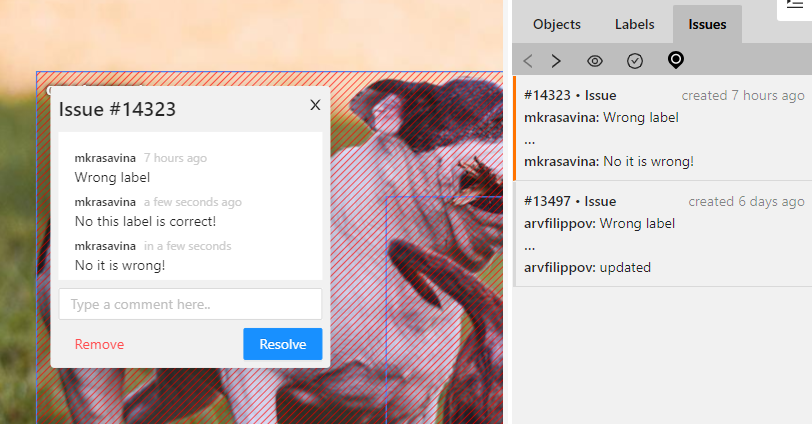
Issues navigation and interface
This section describes navigation, interface and comments section.
Issues tab
The created issue will appear on the Objects sidebar, in the Issues tab.
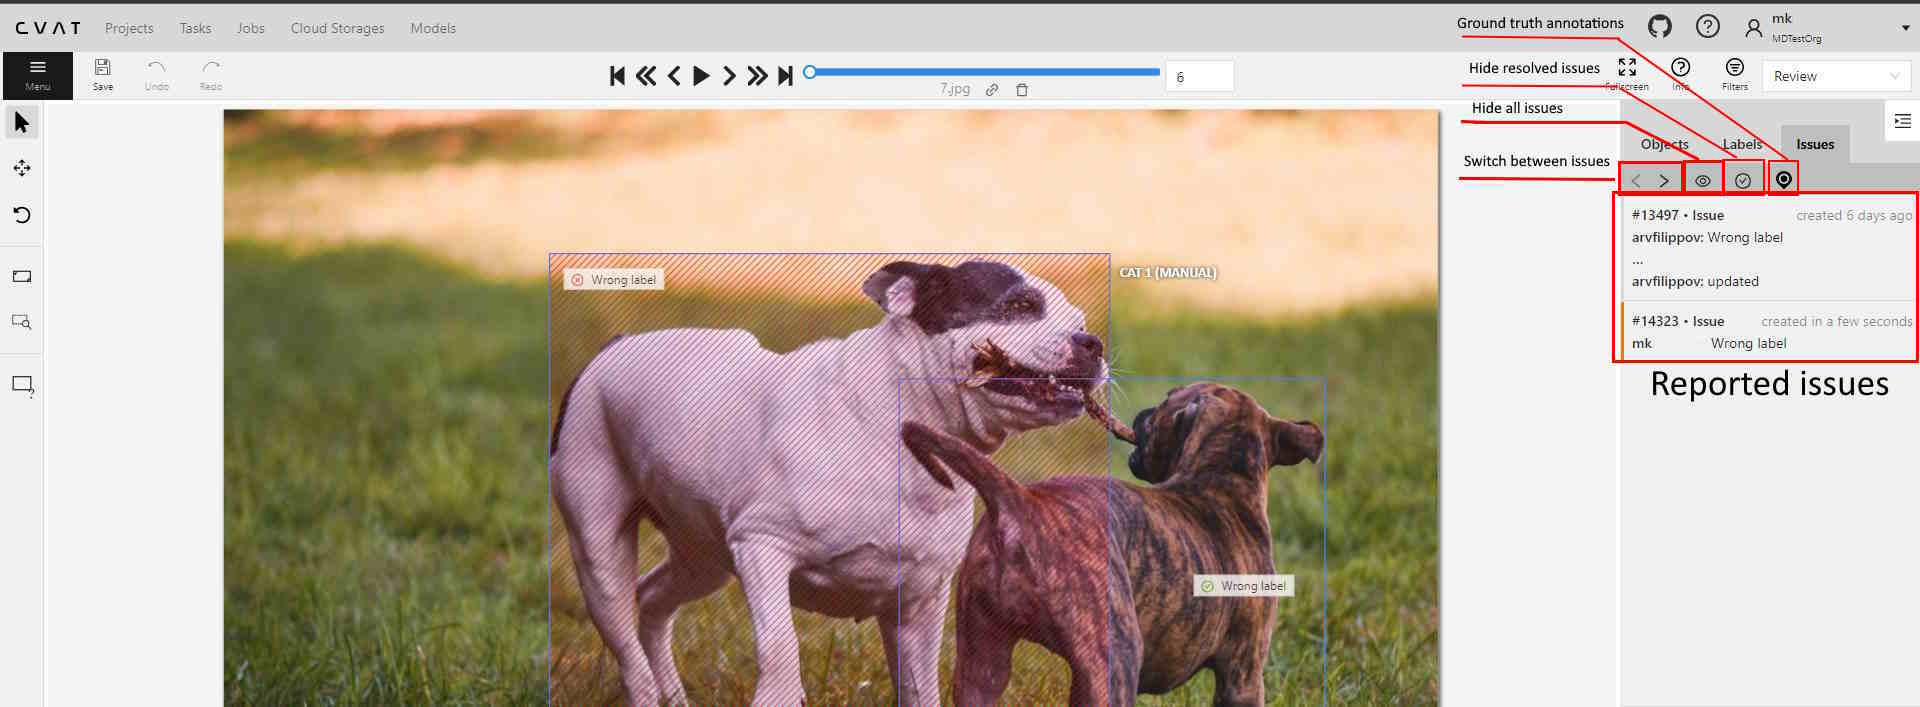
It has has the following elements:
| Element | Description |
|---|---|
| Arrows | You can switch between issues by clicking on arrows |
| Hide all issues | Click on the eye icon to hide all issues |
| Hide resolved issues | Click on the check mark to hide only resolved issues |
| Ground truth | Show ground truth annotations and objects |
Issues workspace
In the workspace, you can click on the issue, and add a comment on the issue, remove (Remove) it, or resolve (Resolve) it.
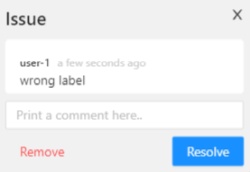
To reopen the resolved issue, click Reopen.
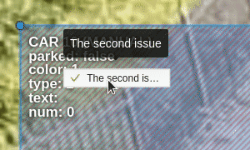
You can easily access multiple issues created in one location by hovering over an issue and scrolling the mouse wheel.
Issues comments
You can add as many comments as needed to the issue.
In the Objects toolbar, only the first and last comments will be displayed
You can copy and paste comments text.
Manual QA complete video tutorial
This video demonstrates the process: