Annotation with skeletons
In this guide, we delve into the efficient process of annotating complex structures through the implementation of Skeleton annotations.
Skeletons serve as annotation templates for annotating complex objects with a consistent structure, such as human pose estimation or facial landmarks.
A Skeleton is composed of numerous points (also referred to as elements), which may be connected by edges. Each point functions as an individual object, possessing unique attributes and properties like color, occlusion, and visibility.
Skeletons can be exported in two formats: CVAT for image and COCO Keypoints.
Note: that skeletons’ labels cannot be imported in a label-less project by importing a dataset. You need to define the labels manually before the import.
See:
- Adding Skeleton manually
- Adding Skeleton labels from the model
- Annotation with Skeletons
- Automatic annotation with Skeletons
- Editing skeletons on the canvas
- Editing skeletons on the sidebar
Adding Skeleton manually
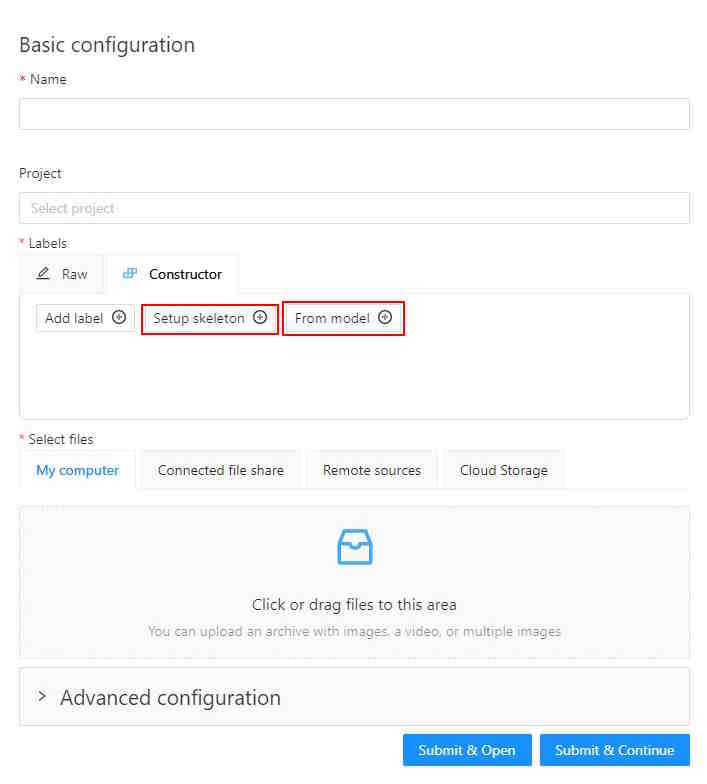
To start annotating using skeletons, you need to set up a Skeleton task in Configurator:
To open Configurator, when creating a task, click on the Setup skeleton button if you want to set up the skeleton manually, or From model if you want to add skeleton labels from a model.
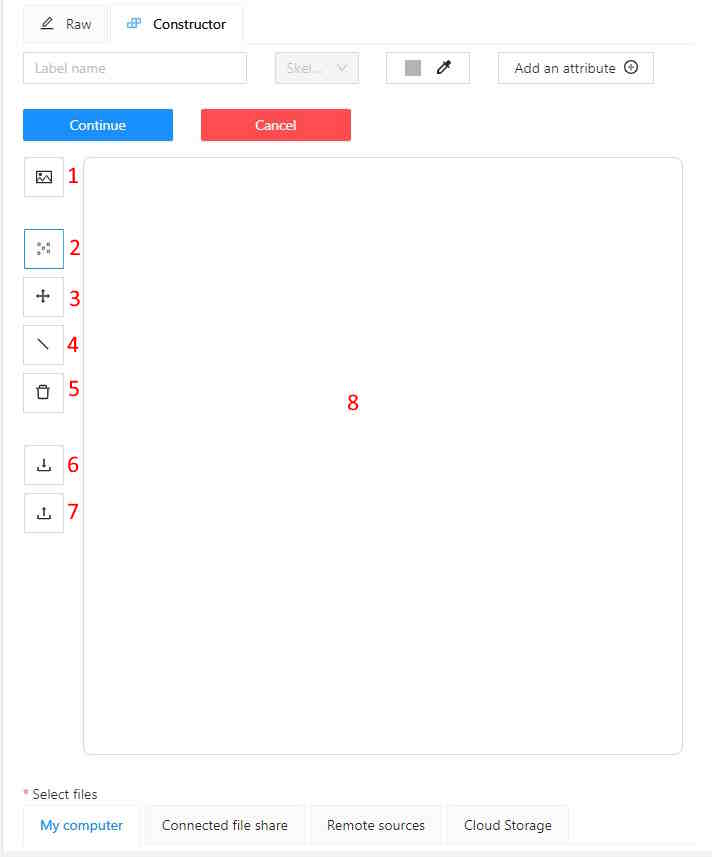
Skeleton Configurator
The skeleton Configurator is a tool to build skeletons for annotation. It has the following fields:
| Number | Name | Description |
|---|---|---|
| 1 | Upload background image | (Optional) Use it to upload a background image, to draw a skeleton on top of it. |
| 2 | Add point | Use it to add Skeleton points to the Drawing area (8). |
| 3 | Click and drag | Use it to move points across the Drawing area (8). |
| 4 | Add edge | Use it to add edge on the Drawing area (8) to connect the points (2). |
| 5 | Remove point | Use it to remove points. Click on Remove point and then on any point (2) on the Drawing area (8) to delete the point. |
| 6 | Download skeleton | Use it to download created skeleton in .SVG format. |
| 7 | Upload skeleton | Use it to upload skeleton in .SVG format. |
| 8 | Drawing area | Use it as a canvas to draw a skeleton. |
Configuring Skeleton points
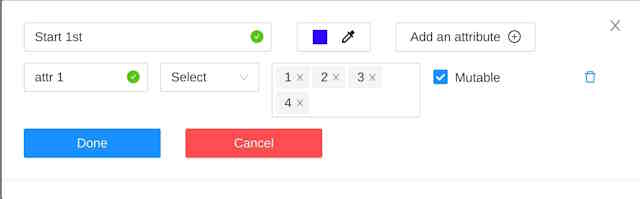
You can name labels, set attributes, and change the color of each point of the skeleton.
To do this, right-click on the skeleton point and select Configure:

In the opened menu, you can change the point setting. It is similar to adding labels and attributes of the regular task:
A Skeleton point can only exist within its parent Skeleton.
Note that you cannot change the skeleton configuration for an existing task/project.
You can copy/insert skeleton configuration from the Raw tab of the label configurator.
Adding Skeleton labels manually
To create the Skeleton task, do the following:
- Open Configurator.
- (Optional) Upload background image.
- In the Label name field, enter the name of the label.
- (Optional) Add attribute
Note: you can add attributes exclusively to each point, for more information, see Configuring Skeleton points - Use Add point to add points to the Drawing area.
- Use Add edge to add edges between points.
- Upload files.
- Click:
- Submit & Open to create and open the task.
- Submit & Continue to submit the configuration and start creating a new task.
Adding Skeleton labels from the model
To add points from the model, and annotate do the following:
-
Open Basic configurator.
-
On the Constructor tab, click From model.
-
From the Select a model to pick labels select the
Human pose estimationmodel or others if available. -
Click on the model’s labels, you want to use.
Selected labels will become gray.
-
(Optional) If you want to adjust labels, within the label, click the Update attributes icon.
The Skeleton configurator will open, where you can configure the skeleton.
Note: Labels cannot be adjusted after the task/project is created. -
Click Done. The labels, that you selected, will appear in the labels window.
-
Upload data.
-
Click:
- Submit & Open to create and open the task.
- Submit & Continue to submit the configuration and start creating a new task.
Annotation with Skeletons
To annotate with Skeleton, do the following
-
Open job.
-
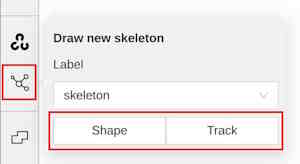
On the tools panel select Draw new skeleton.
-
Select Track or Shape to annotate. without tracking.
-
Draw a skeleton on the image.
Automatic annotation with Skeletons
To automatically annotate with Skeleton, do the following
-
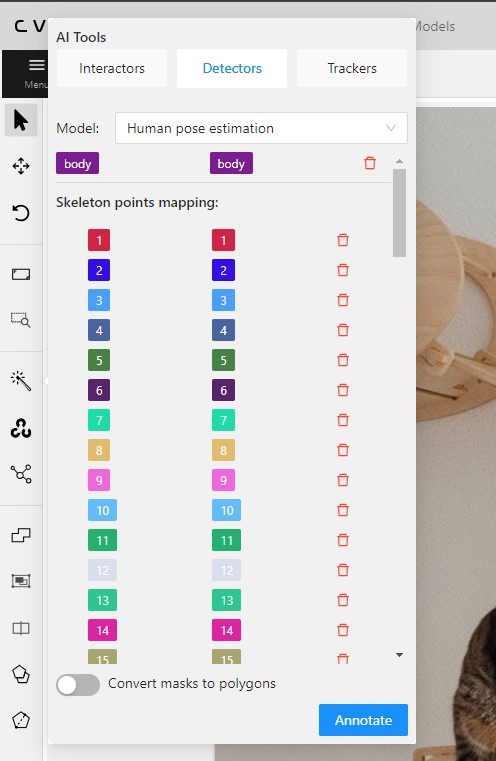
Open the job and on the tools panel select AI Tools > Detectors
-
From the drop-down list select the model. You will see a list of points to match and the name of the skeleton on the top of the list.
-
(Optional) By clicking on the Bin icon, you can remove any mapped item:
- A skeleton together with all points.
- Certain points from two mapped skeletons.
-
Click Annotate.
Editing skeletons on the canvas
A drawn skeleton is encompassed within a bounding box, it allows you to manipulate the skeleton as a regular bounding box, enabling actions such as dragging, resizing, or rotating:
Upon repositioning a point, the bounding box adjusts automatically, without affecting other points:

Additionally, Shortcuts are applicable to both the skeleton as a whole and its elements:
- To use a shortcut to the entire skeleton, hover over the bounding box and push the shortcut keyboard key. This action is applicable for shortcuts like the lock, occluded, pinned, keyframe, and outside for skeleton tracks.
- To use a shortcut to a specific skeleton point, hover over the point and push the shortcut keyboard key. The same list of shortcuts is available, with the addition of outside, which is also applicable to individual skeleton shape elements.
Editing skeletons on the sidebar
In CVAT, the sidebar offers an alternative method for setting up skeleton properties and attributes.
This approach is similar to that used for other object types supported by CVAT, but with a few specific alterations:
An additional collapsible section is provided for users to view a comprehensive list of skeleton parts.
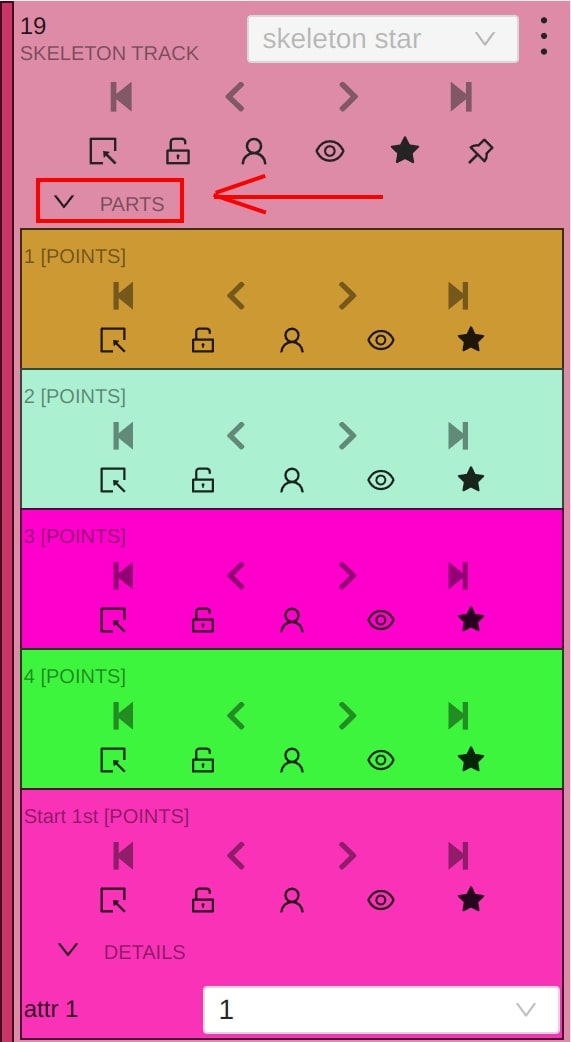
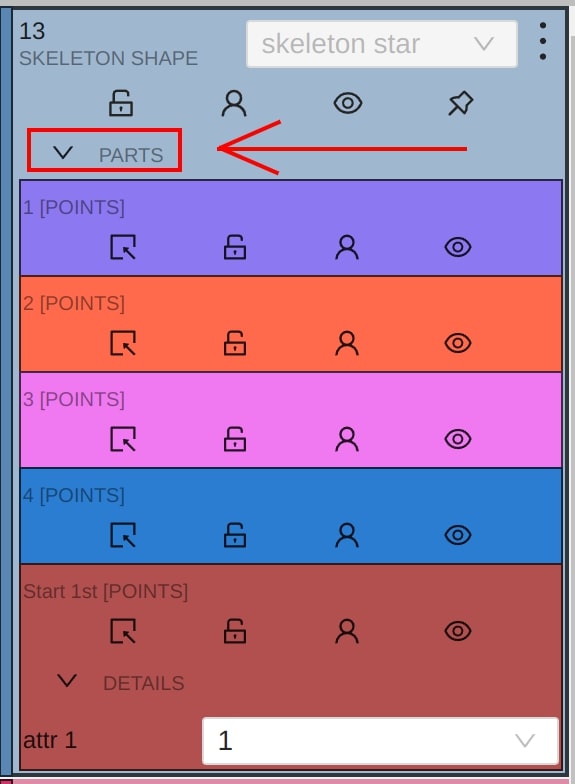
Skeleton points can have properties like Outside, Occluded, and Hidden.

Both Outside and Hidden make a skeleton point invisible.
-
Outside property is part of annotations. Use it when part of the object is out of frame borders.
-
Hidden makes a point hidden only for the annotator’s convenience, this property will not be saved between different sessions.
-
Occluded keeps the point visible on the frame and usually means that the point is still on a frame, just hidden behind another object.