Attach cloud storage
In CVAT you can use AWS S3, Azure Blob Storage and Google Cloud Storage storages to import and export image datasets for your tasks.
See:
AWS S3
Create a bucket
To create bucket, do the following:
-
Create an AWS account.
-
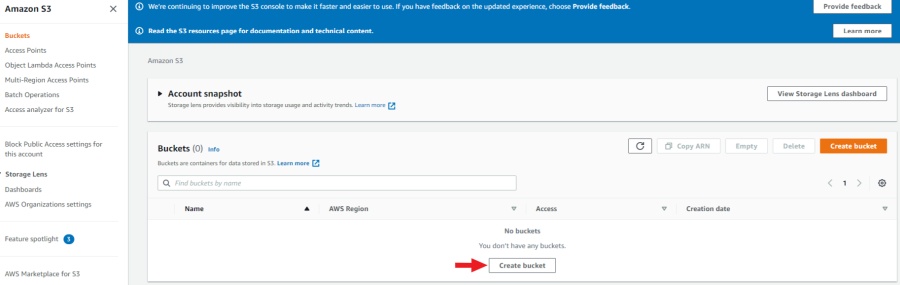
Go to console AWS-S3, and click Create bucket.
-
Specify the name and region of the bucket. You can also copy the settings of another bucket by clicking on the Choose bucket button.
-
Enable Block all public access. For access, you will use access key ID and secret access key.
-
Click Create bucket.
A new bucket will appear on the list of buckets.
Upload data
Note: manifest file is optional.
You need to upload data for annotation and the manifest.jsonl file.
-
Prepare data. For more information, see prepare the dataset.
-
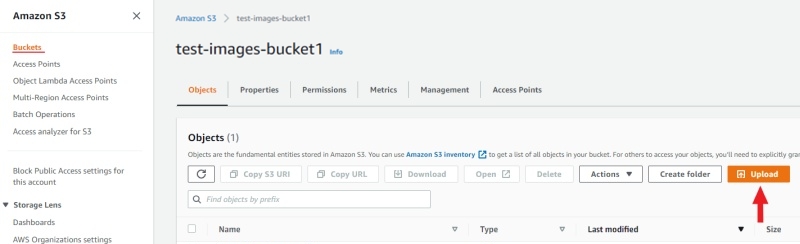
Open the bucket and click Upload.
-
Drag the manifest file and image folder on the page and click Upload:
Access permissions
Authenticated access
To add access permissions, do the following:
-
Go to IAM and click Add users.
-
Set User name and enable Access key - programmatic access.

-
Click Next: Permissions.
-
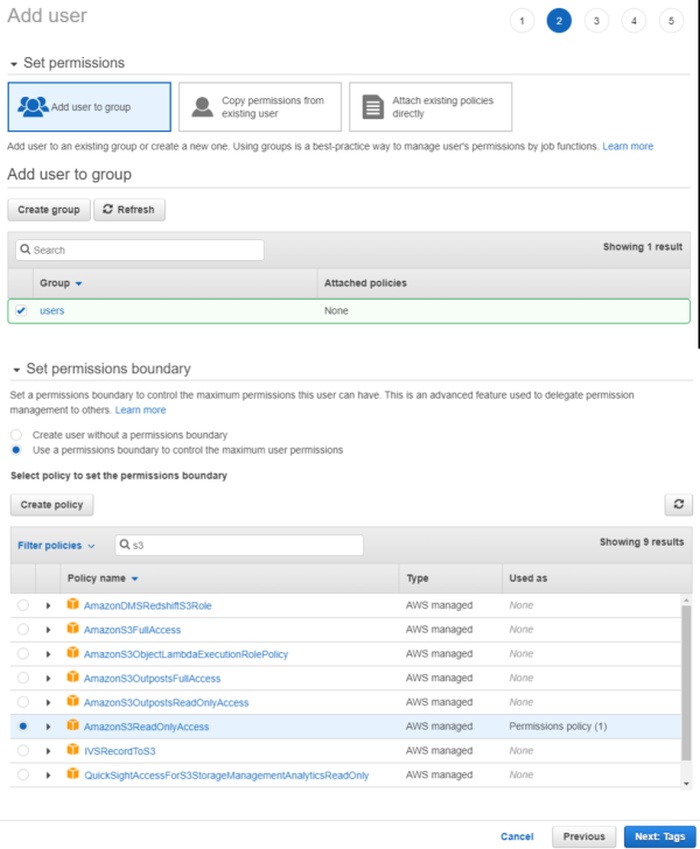
Click Create group, enter the group name.
-
Use search to find and select:
- For read-only access: AmazonS3ReadOnlyAccess.
- For full access: AmazonS3FullAccess.
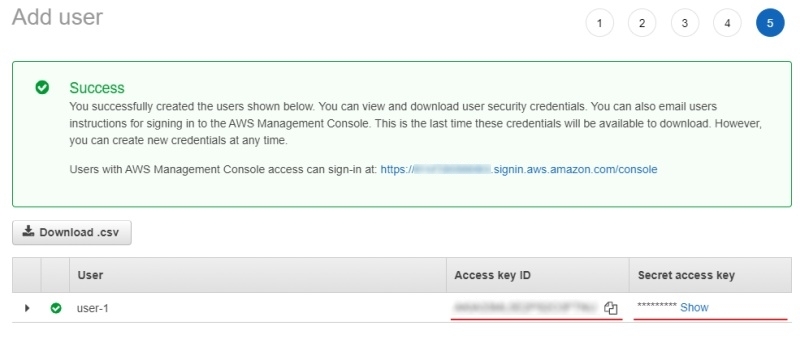
-
(Optional) Add tags for the user and go to the next page.
-
Save Access key ID and Secret access key.
For more information, see Creating an IAM user in your AWS account
Anonymous access
On how to grant public access to the bucket, see Configuring block public access settings for your S3 buckets
Attach AWS S3 storage
To attach storage, do the following:
- Log into CVAT and in the separate tab open your bucket page.
- In the CVAT, on the top menu select Cloud storages > on the opened page click +.
Fill in the following fields:
| CVAT | AWS S3 |
|---|---|
| Display name | Preferred display name for your storage. |
| Description | (Optional) Add description of storage. |
| Provider | From drop-down list select AWS S3. |
| Bucket name | Name of the Bucket. |
| Authentication type | Depends on the bucket setup: |
| Region | (Optional) Choose a region from the list or add a new one. For more information, see Available locations. |
| Prefix | (Optional) Prefix is used to filter bucket content. By setting a default prefix, you ensure that only data from a specific folder in the cloud is used in CVAT. This will affect which files you see when creating a task with cloud data. |
| Manifests | (Optional) Click + Add manifest and enter the name of the manifest file with an extension. For example: manifest.jsonl. |
After filling in all the fields, click Submit.
AWS S3 manifest file
Note: manifest file is optional.
To prepare the manifest file, do the following:
- Go to AWS CLI and run script for prepare manifest file.
- Perform the installation, following the aws-shell manual,
You can configure credentials by runningaws configure.
You will need to enterAccess Key IDandSecret Access Keyas well as the region.
aws configure
Access Key ID: <your Access Key ID>
Secret Access Key: <your Secret Access Key>
- Copy the content of the bucket to a folder on your computer:
aws s3 cp <s3://bucket-name> <yourfolder> --recursive
- After copying the files, you can create a manifest file as described in preapair manifest file section:
python <cvat repository>/utils/dataset_manifest/create.py --output-dir <yourfolder> <yourfolder>
- When the manifest file is ready, upload it to aws s3 bucket:
- For read and write permissions when you created the user, run:
aws s3 cp <yourfolder>/manifest.jsonl <s3://bucket-name>
- For read-only permissions, use the download through the browser, click upload, drag the manifest file to the page and click upload.
Video tutorial: Add AWS S3 as Cloud Storage in CVAT
Google Cloud Storage
Create a bucket
To create bucket, do the following:
- Create Google account and log into it.
- On the Google Cloud page, click Start Free, then enter the required
data and accept the terms of service.
Note: Google requires to add payment, you will need a bank card to accomplish step 2.
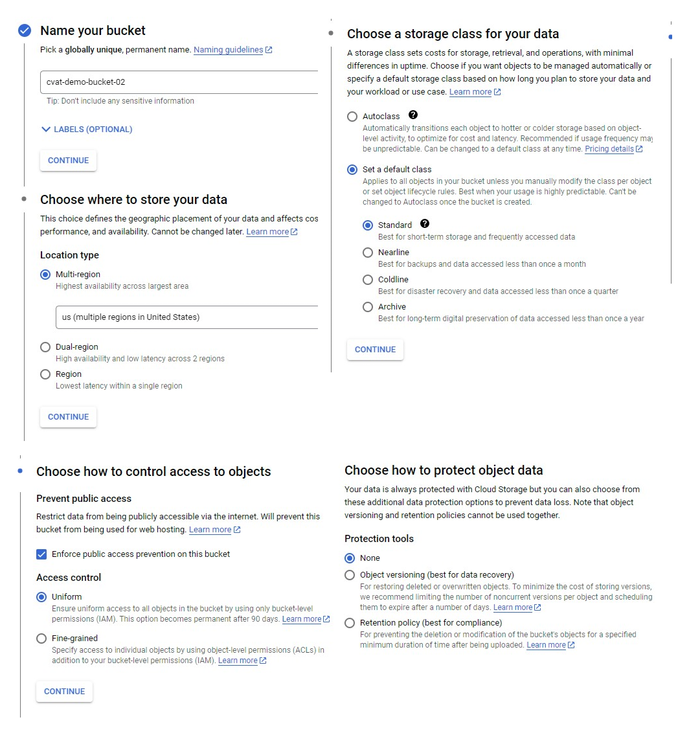
- Create a Bucket with the following parameters:
- Name your bucket: Unique name.
- Choose where to store your data: Set up a location nearest to you.
- Choose a storage class for your data:
Set a default class>Standard. - Choose how to control access to objects:
Enforce public access prevention on this bucket>Uniform(default). - How to protect data:
None
You will be forwarded to the bucket.
Upload data
Note: manifest file is optional.
You need to upload data for annotation and the manifest.jsonl file.
- Prepare data. For more information, see prepare the dataset.
- Open the bucket and from the top menu select Upload files or Upload folder (depends on how your files are organized).
Access permissions
To access Google Cloud Storage get a Project ID from cloud resource manager page
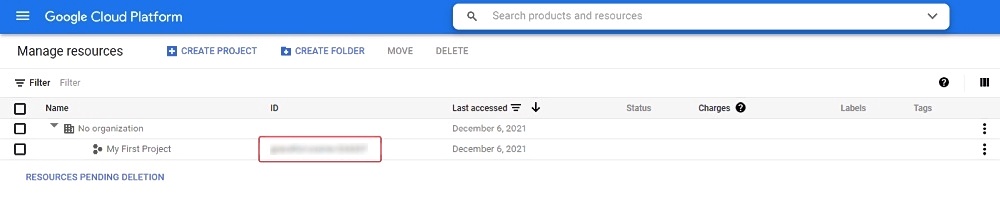
And follow instructions below based on the preferable type of access.
Authenticated access
For authenticated access you need to create a service account and key file.
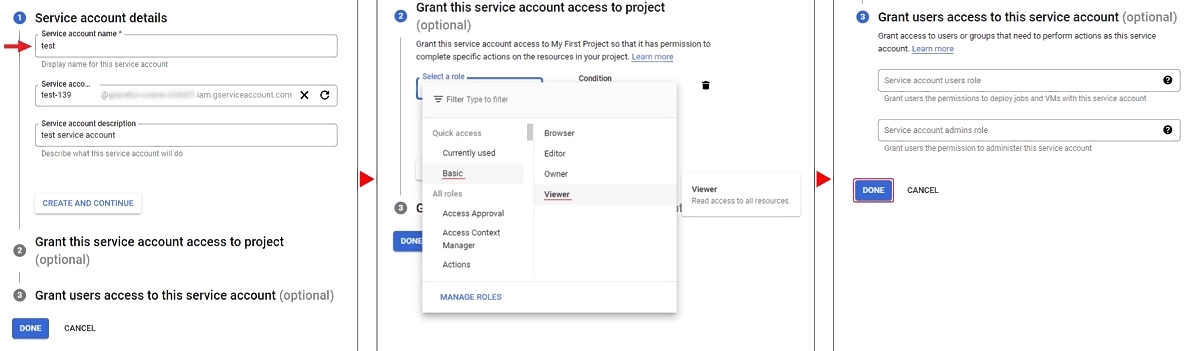
To create a service account:
- On the Google Cloud platform, go to IAM & Admin > Service Accounts and click +Create Service Account.
- Enter your account name and click Create And Continue.
- Select a role, for example Basic > Viewer, and click Continue.
- (Optional) Give access rights to the service account.
- Click Done.
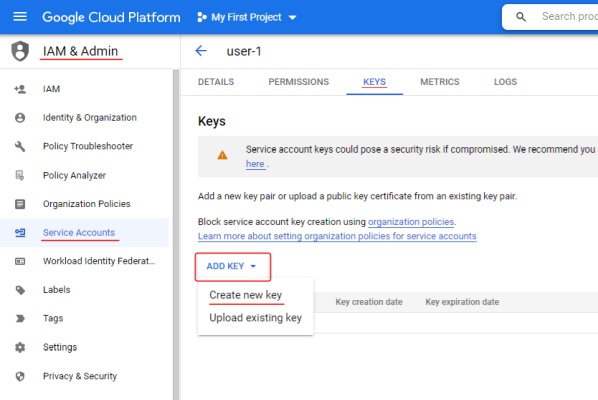
To create a key:
- Go to IAM & Admin > Service Accounts > click on account name > Keys.
- Click Add key and select Create new key > JSON
- Click Create. The key file will be downloaded automatically.
For more information about keys, see Learn more about creating keys.
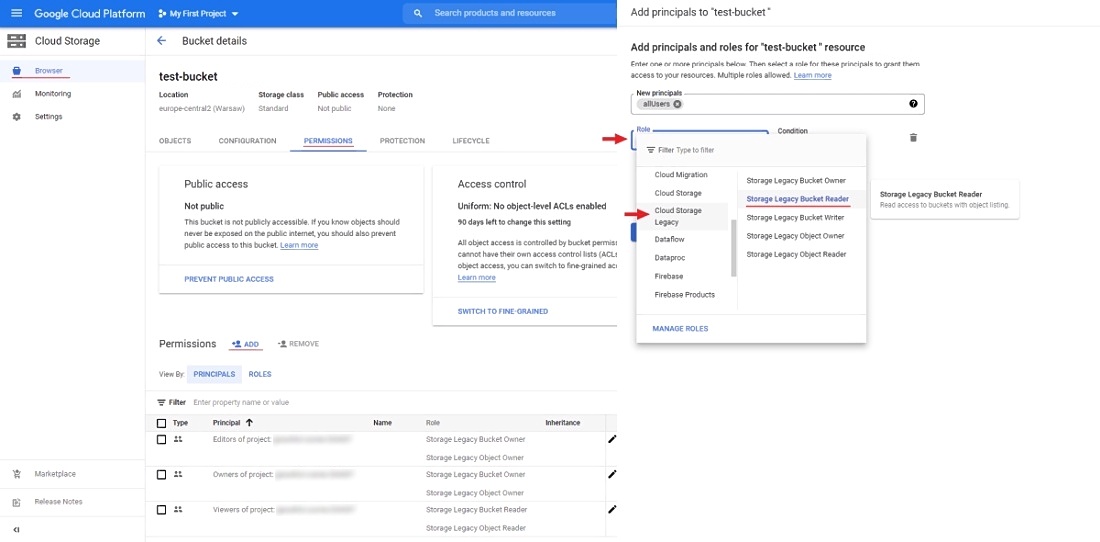
Anonymous access
To configure anonymous access:
- Open the bucket and go to the Permissions tab.
- Сlick + Grant access to add new principals.
- In the New principals field specify
allUsers, select roles:Cloud Storage Legacy>Storage Legacy Bucket Reader. - Click Save.
Now you can attach the Google Cloud Storage bucket to CVAT.
Attach Google Cloud Storage
To attach storage, do the following:
- Log into CVAT and in the separate tab open your bucket page.
- In the CVAT, on the top menu select Cloud storages > on the opened page click +.
Fill in the following fields:
| CVAT | Google Cloud Storage |
|---|---|
| Display name | Preferred display name for your storage. |
| Description | (Optional) Add description of storage. |
| Provider | From drop-down list select Google Cloud Storage. |
| Bucket name | Name of the bucket. You can find it on the storage browser page. |
| Authentication type | Depends on the bucket setup: Advanced: For self-hosted solution, if the key file was not attached, then environment variable GOOGLE_APPLICATION_CREDENTIALS that was specified for an environment will be used. For more information, see Authenticate to Cloud services using client libraries. |
| Prefix | (Optional) Used to filter data from the bucket. By setting a default prefix, you ensure that only data from a specific folder in the cloud is used in CVAT. This will affect which files you see when creating a task with cloud data. |
| Project ID | Project ID. For more information, see projects page and cloud resource manager page. Note: Project name does not match the project ID. |
| Location | (Optional) Choose a region from the list or add a new one. For more information, see Available locations. |
| Manifests | (Optional) Click + Add manifest and enter the name of the manifest file with an extension. For example: manifest.jsonl. |
After filling in all the fields, click Submit.
Video tutorial: Add Google Cloud Storage as Cloud Storage in CVAT
Microsoft Azure Blob Storage
Create a bucket
To create bucket, do the following:
-
Create an Microsoft Azure account and log into it.
-
Go to Azure portal, hover over the resource , and in the pop-up window click Create.
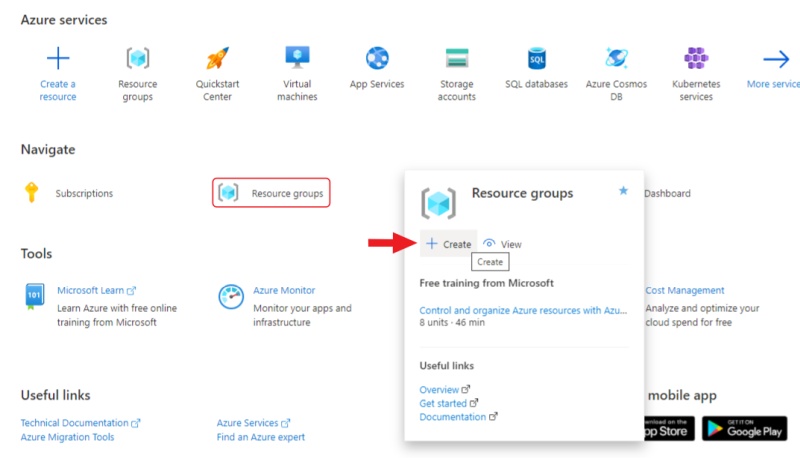
-
Enter a name for the group and click Review + create, check the entered data and click Create.
-
Go to the resource groups page, navigate to the group that you created and click Create resources.
-
On the marketplace page, use search to find Storage account.
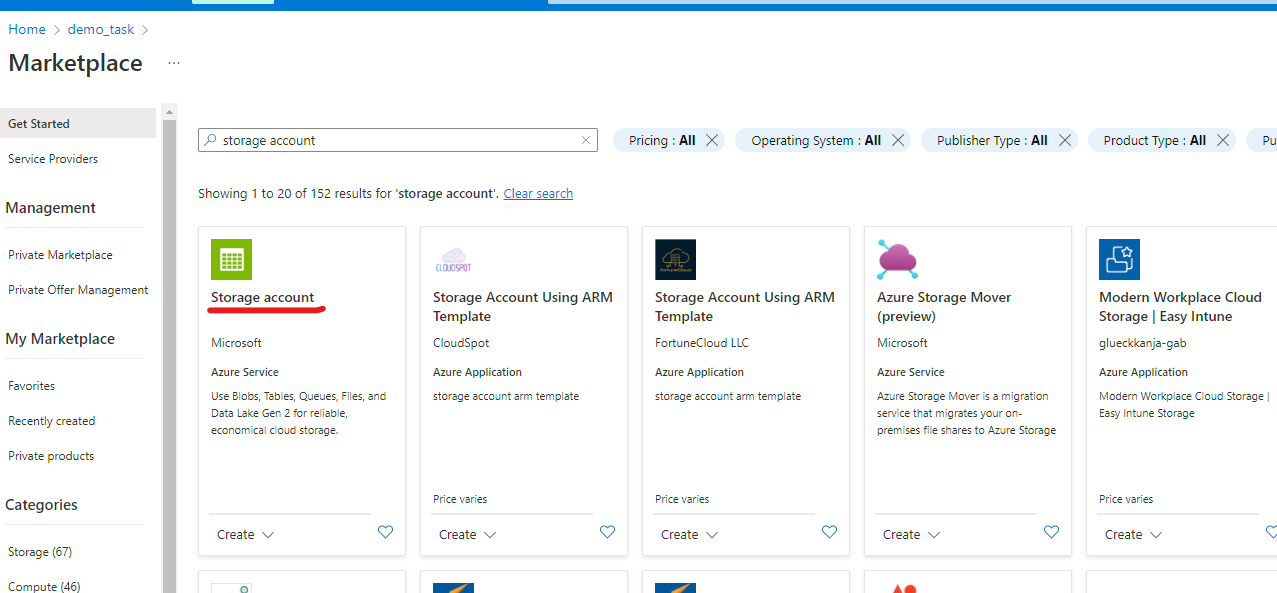
-
Click on Storage account and on the next page click Create.
-
On the Basics tab, fill in the following fields:
- Storage account name: to access container from CVAT.
- Select a region closest to you.
- Select Performance > Standart.
- Select Local-redundancy storage (LRS).
- Click next: Advanced>.

-
On the Advanced page, fill in the following fields:
- (Optional) Disable Allow enabling public access on containers to prohibit anonymous access to the container.
- Click Next > Networking.
-
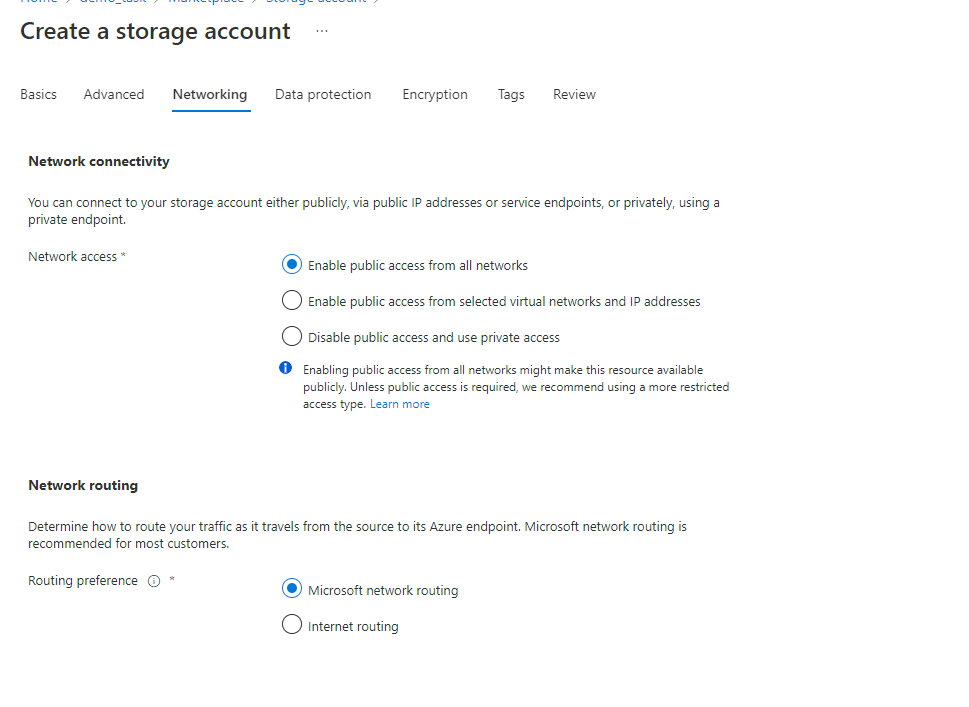
On the Networking tab, fill in the following fields:
-
If you want to change public access, enable Public access from all networks.
-
Click Next>Data protection.
You do not need to change anything in other tabs until you need some specific setup.
-
-
Click Review and wait for the data to load.
-
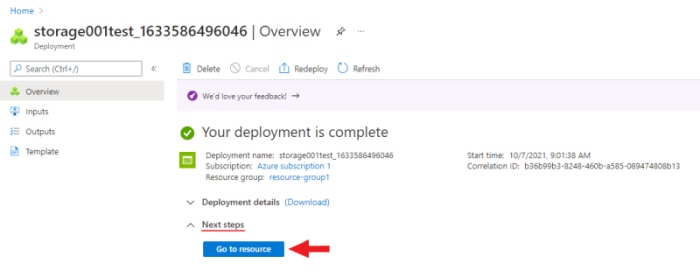
Click Create. Deployment will start.
-
After deployment is over, click Go to resource.
Create a container
To create container, do the following:
- Go to the containers section and on the top menu click +Container
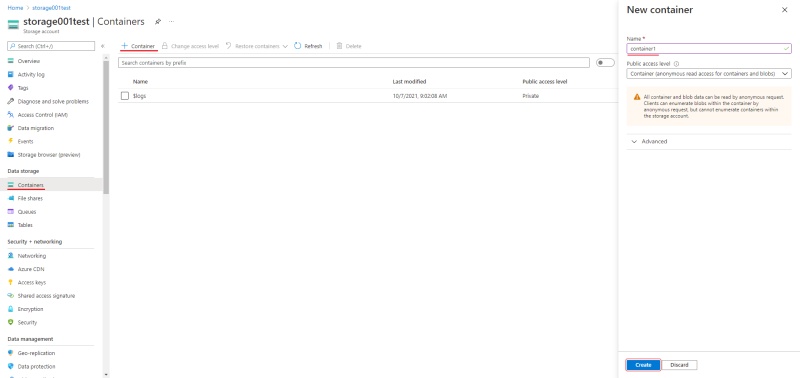
- Enter the name of the container.
- (Optional) In the Public access level drop-down, select type of the access.
Note: this field will inactive if you disabled Allow enabling public access on containers. - Click Create.
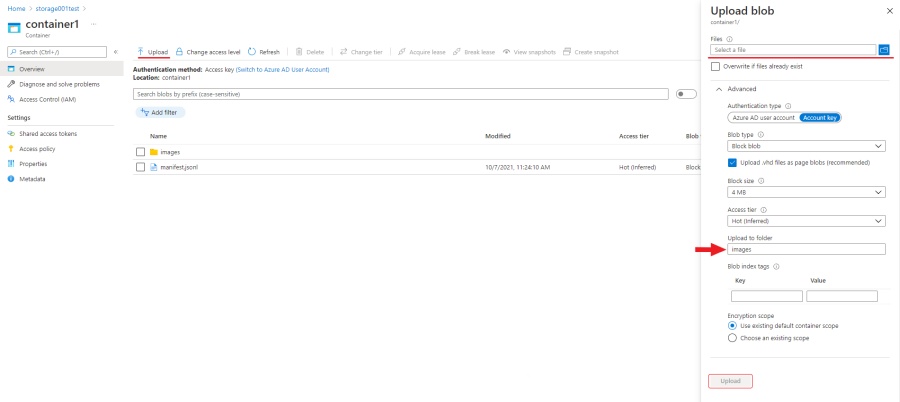
Upload data
You need to upload data for annotation and the manifest.jsonl file.
- Prepare data. For more information, see prepare the dataset.
- Go to container and click Upload.
- Click Browse for files and select images.
Note: If images are in folder, specify folder in the Advanced settings > Upload to folder.
- Click Upload.
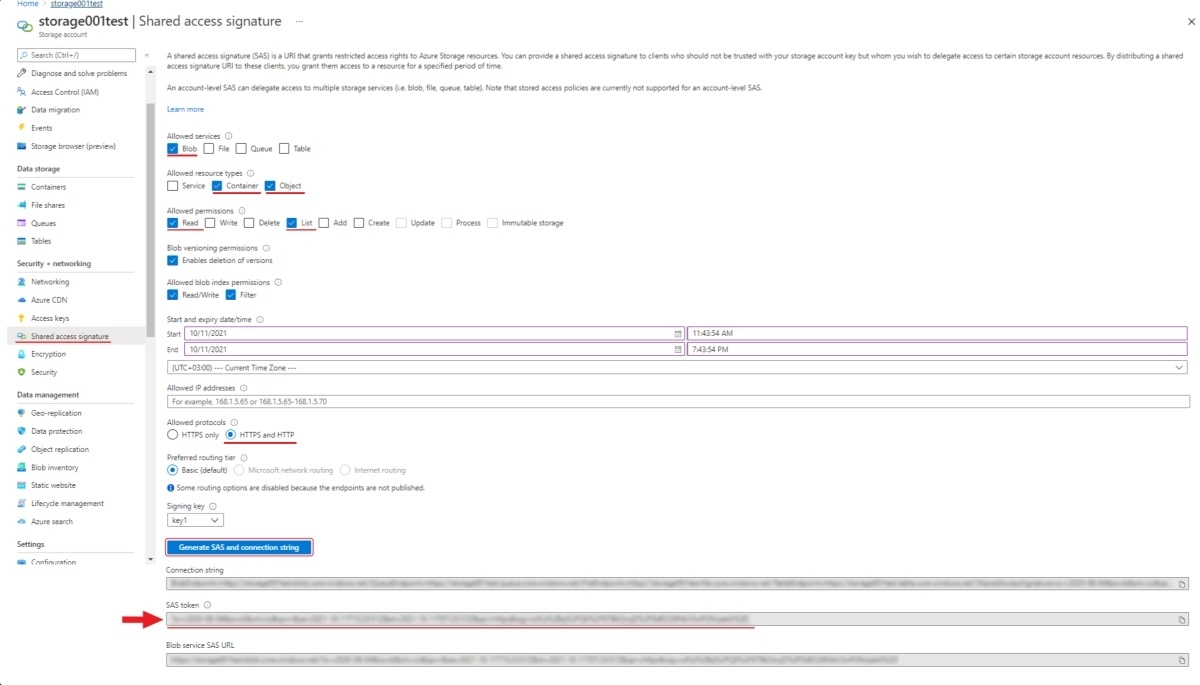
SAS token and connection string
Use the SAS token or connection string to grant secure access to the container.
To configure the credentials:
- Go to Home > Resourse groups > You resource name > Your storage account.
- On the left menu, click Shared access signature.
- Change the following fields:
- Allowed services: Enable Blob . Disable all other fields.
- Allowed resource types: Enable Container and Object. Disable all other fields.
- Allowed permissions: Enable Read, Write, and List. Disable all other fields.
- Start and expiry date: Set up start and expiry dates.
- Allowed protocols: Select HTTPS and HTTP
- Leave all other fields with default parameters.
- Click Generate SAS and connection string and copy SAS token or Connection string.
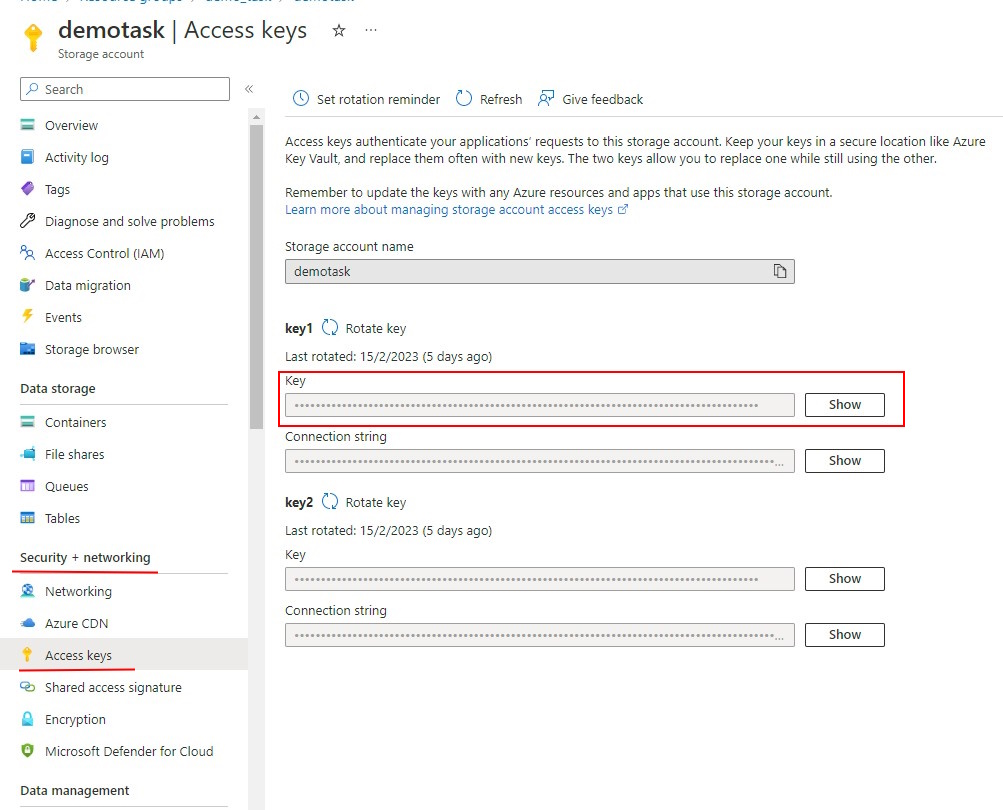
Personal use
For personal use, you can use the Access Key from your storage account in the CVAT SAS Token field.
To get the Access Key:
- In the Azure Portal, go to the Security + networking > Access Keys
- Click Show and copy the key.
Attach Azure Blob Storage
To attach storage, do the following:
- Log into CVAT and in the separate tab open your bucket page.
- In the CVAT, on the top menu select Cloud storages > on the opened page click +.
Fill in the following fields:
| CVAT | Azure |
|---|---|
| Display name | Preferred display name for your storage. |
| Description | (Optional) Add description of storage. |
| Provider | From drop-down list select Azure Blob Container. |
| Container name` | Name of the cloud storage container. |
| Authentication type | Depends on the container setup. Account name and SAS token:
|
| Prefix | (Optional) Used to filter data from the bucket. By setting a default prefix, you ensure that only data from a specific folder in the cloud is used in CVAT. This will affect which files you see when creating a task with cloud data. |
| Manifests | (Optional) Click + Add manifest and enter the name of the manifest file with an extension. For example: manifest.jsonl. |
After filling in all the fields, click Submit.
Video tutorial: Add Microsoft Azure Blob Storage as Cloud Storage in CVAT
Prepare the dataset
For example, the dataset is The Oxford-IIIT Pet Dataset:
- Download the archive with images.
- Unpack the archive into the prepared folder.
- Create a manifest. For more information, see Dataset manifest:
python <cvat repository>/utils/dataset_manifest/create.py --output-dir <your_folder> <your_folder>